

On this page 2 sections
Your guide
What you'll learn
Take your home workouts to the next level with bodyweight chair exercises! Similar to a bench in a traditional gym, you can use a chair in a variety of different ways to get an absolutely killer bodyweight chair workout. Whether it's your arm, elbow, knee, or feet on the chair, your core has to be rock-solid and strong in order to perform bodyweight chair exercises. Let's just say that chairs are not just for sitting on! In this article, we will show you 10 killer bodyweight chair exercises to challenge your home workouts.
Effective Bodyweight Chair Exercises
While demonstrated with a bench, all the following 10 exercises can easily be performed on a chair. But before trying these bodyweight chair exercises at home - safety first!
Flip your chair over and tighten all the screws and nuts.
The last thing we want to happen is for your chair to collapse during your workout! Once everything is tightened, flip your chair back over and place your chair in the middle of an open space in your home. Place a yoga mat in front of your chair, or just ensure that you have proper flooring that is not slippery in front of you. Make sure there is enough space around your chair to move. Some of these exercises require you to lie on your back with your feet on the chair, so you at least need that much space in front of the chair to exercise! All of these exercises + tons more are included in our Sample Prehab Fitness Home Edition Program Exercise, which allows you to workout from the comforts of your home with minimal to no equipment!
Are You Looking For A Way To Stay Fit From Home?

Sometimes it may be difficult for you to get to the gym. Whether it be access issues, lack of time due to job demands, or membership fees! Prehab Fitness Home Edition is a physical therapist-designed program that includes various workouts and training support with minimal to no equipment! The beauty of this program is that you can honestly perform it anywhere. All you need is yourself, some space to work, and motivation! To gain access to our Prehab Fitness Home Edition, click HERE!
Exercise 01 of 08
Exercise demonstration
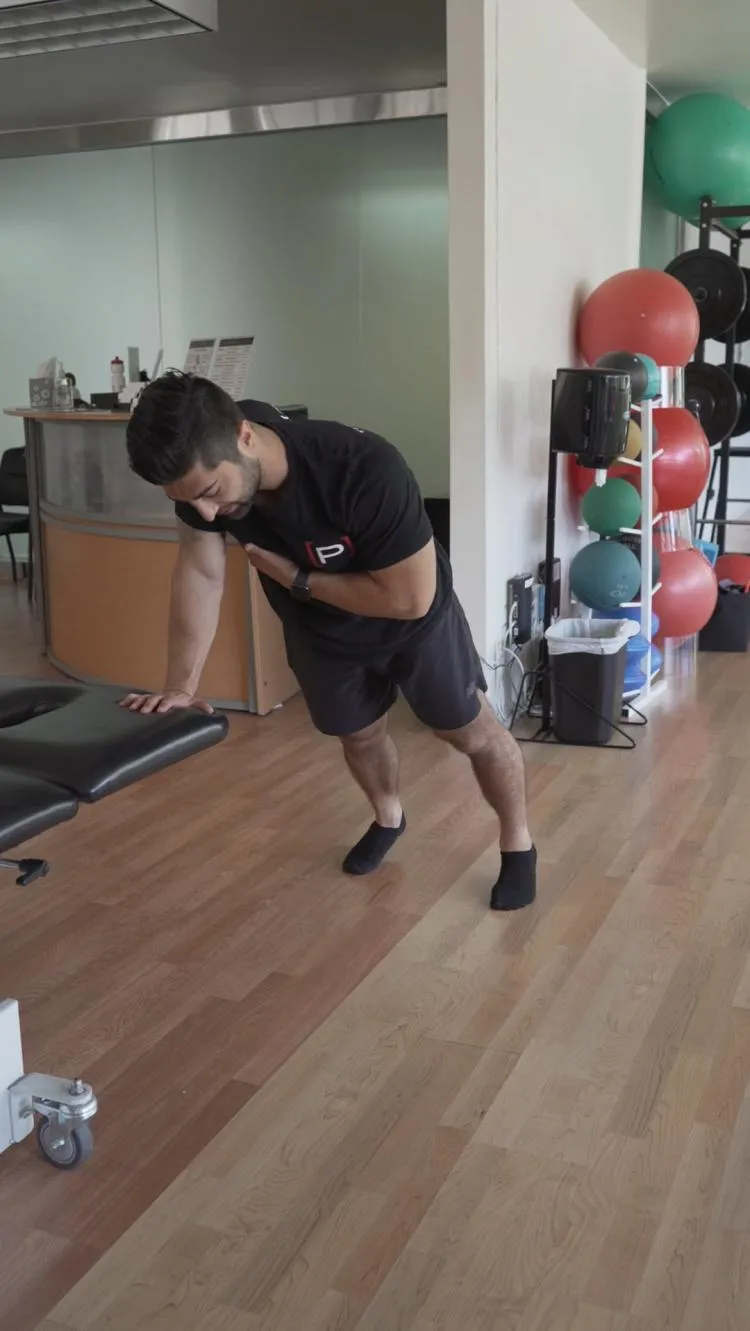
Single Arm Push Up Plus - Elevated
View exercise instructions
- HOW: Find an elevated surface to one arm on. In a high plank position keeping your body in line (feet up to shoulders). Allow the scapula to sag then push the scapula away from you pushing your chest away from the floor. Return back to starting position and repeat.
- FEEL: The Shoulder muscles working.
- COMPENSATION: Avoid moving at the elbows as you perform this exercise. Make sure the motion is coming from your shoulder blade.
This is a very advanced version of your traditional scapular push up, a foundational exercise for serratus anterior strengthening. If this is too hard, we recommend starting with two hands or even learning to protract and retract your scapula with the exercises in the article below!
Exercise 02 of 08
Exercise demonstration
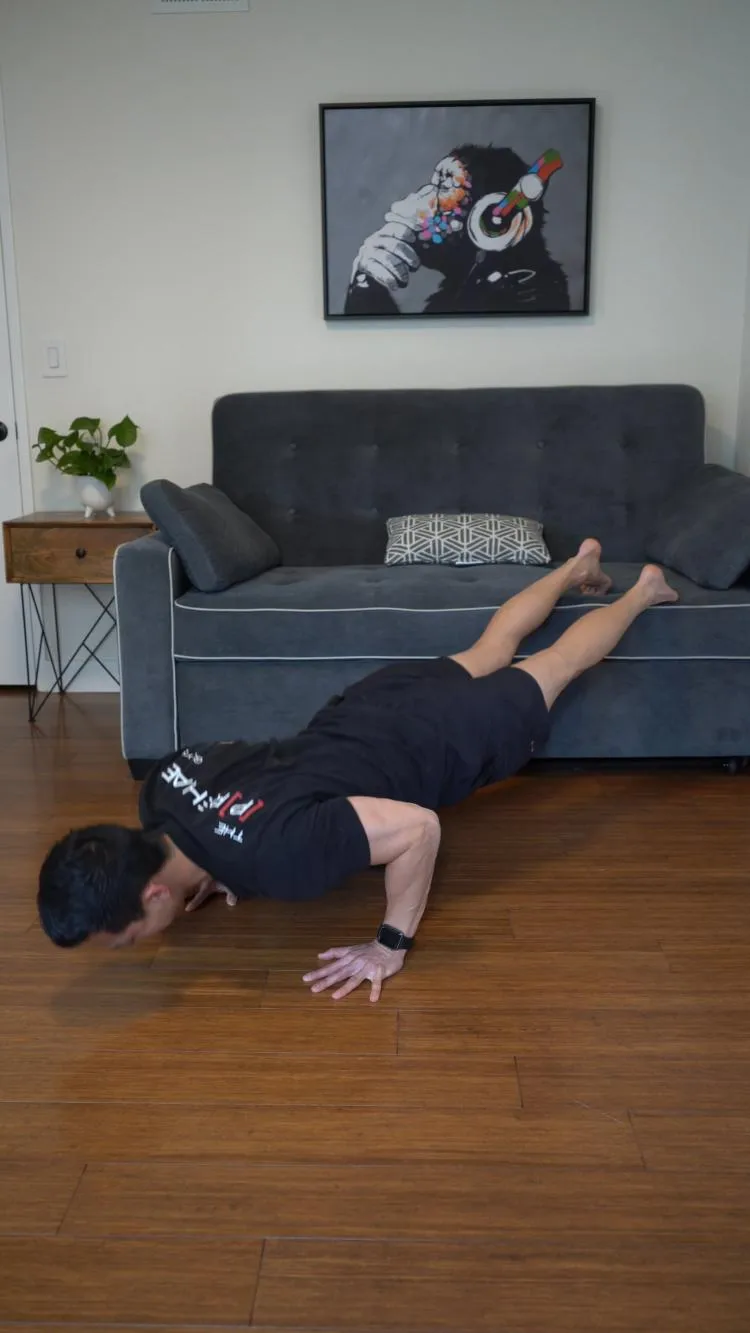
Decline Push Up
View exercise instructions
- HOW: Start on your hands with your feet supported on an elevated surface. Have your hands positioned under your shoulders but closer to the top of your abs. To begin the exercise, assume a high plank position, while keeping your body straight lower your chest down towards the ground as far as you can, push up to the starting position and repeat.
- FEEL: This should feel like an upper body workout, your shoulders, chest, and triceps. You should also feel your core and your glutes/quads working to maintain a straight body from your heels to the back of your head.
- COMPENSATION: Keep your body in a straight line, don't hike your hips high in the air or let your butt sag to the ground. Stay evenly balanced through both arms as you lower down and push up.
Once you've mastered the scapular push up, try incorporating that into a normal push up! The goal is full scapular protraction at the top of the push up. To make things even harder, put both of your feet on a chair behind you for decline push ups! Not only are you pushing more of your body weight, but the shoulder angle on a decline push up will target the pecs more than the triceps.
Exercise 03 of 08
Exercise demonstration
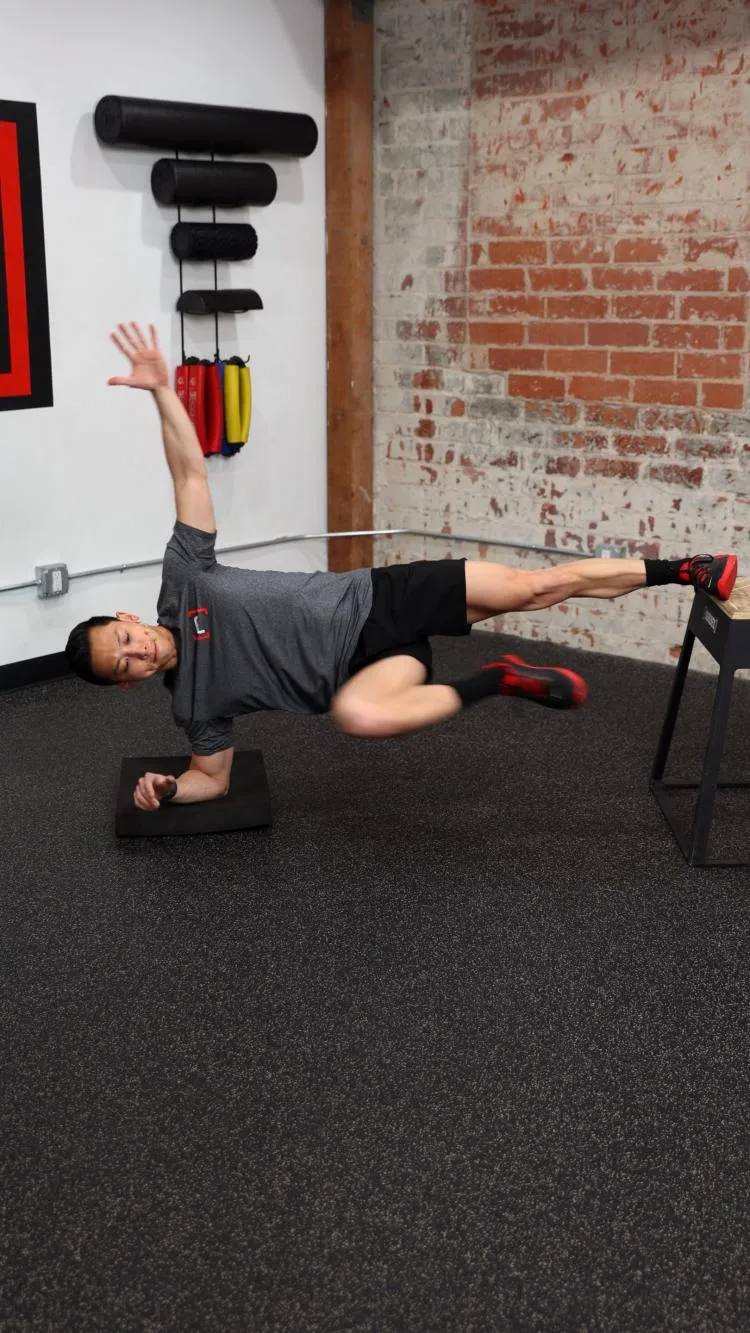
Copenhagen Plank - Leg Driver
View exercise instructions
- HOW: Using some sort of elevates surface like a box or bench, place the side you want to target on the box. Place the inside part of your ankle on this surface, use something soft for padding if you like. Lift your hips in the arm by driving the inside part of your ankle downward into the box and hold this position.
- FEEL: You should feel all the muscles on the inside part of your thigh working, in particular your groin region. You will also feel your core and shoulder muscles working. If you feel the inside part of your knee hurting with this exercise, put your knee on the elevated surface instead of your ankle.
- COMPENSATION: Keep your hips stacked on top of each other, do not rotate them forward or back. Put your elbow directly below your shoulder.
This is a very advanced version of your classic Copenhagen side plank. To build up your strength and tolerance to this variation, check out the regressed version below! A 2019 study by Haroy et al found that just adding one variation of Copenhagen planks decreased the risk of injury by 41% in a group of semi-professional soccer players.
Master Your Home Workouts With This Tip | Episode 11
Exercise 04 of 08
Exercise demonstration
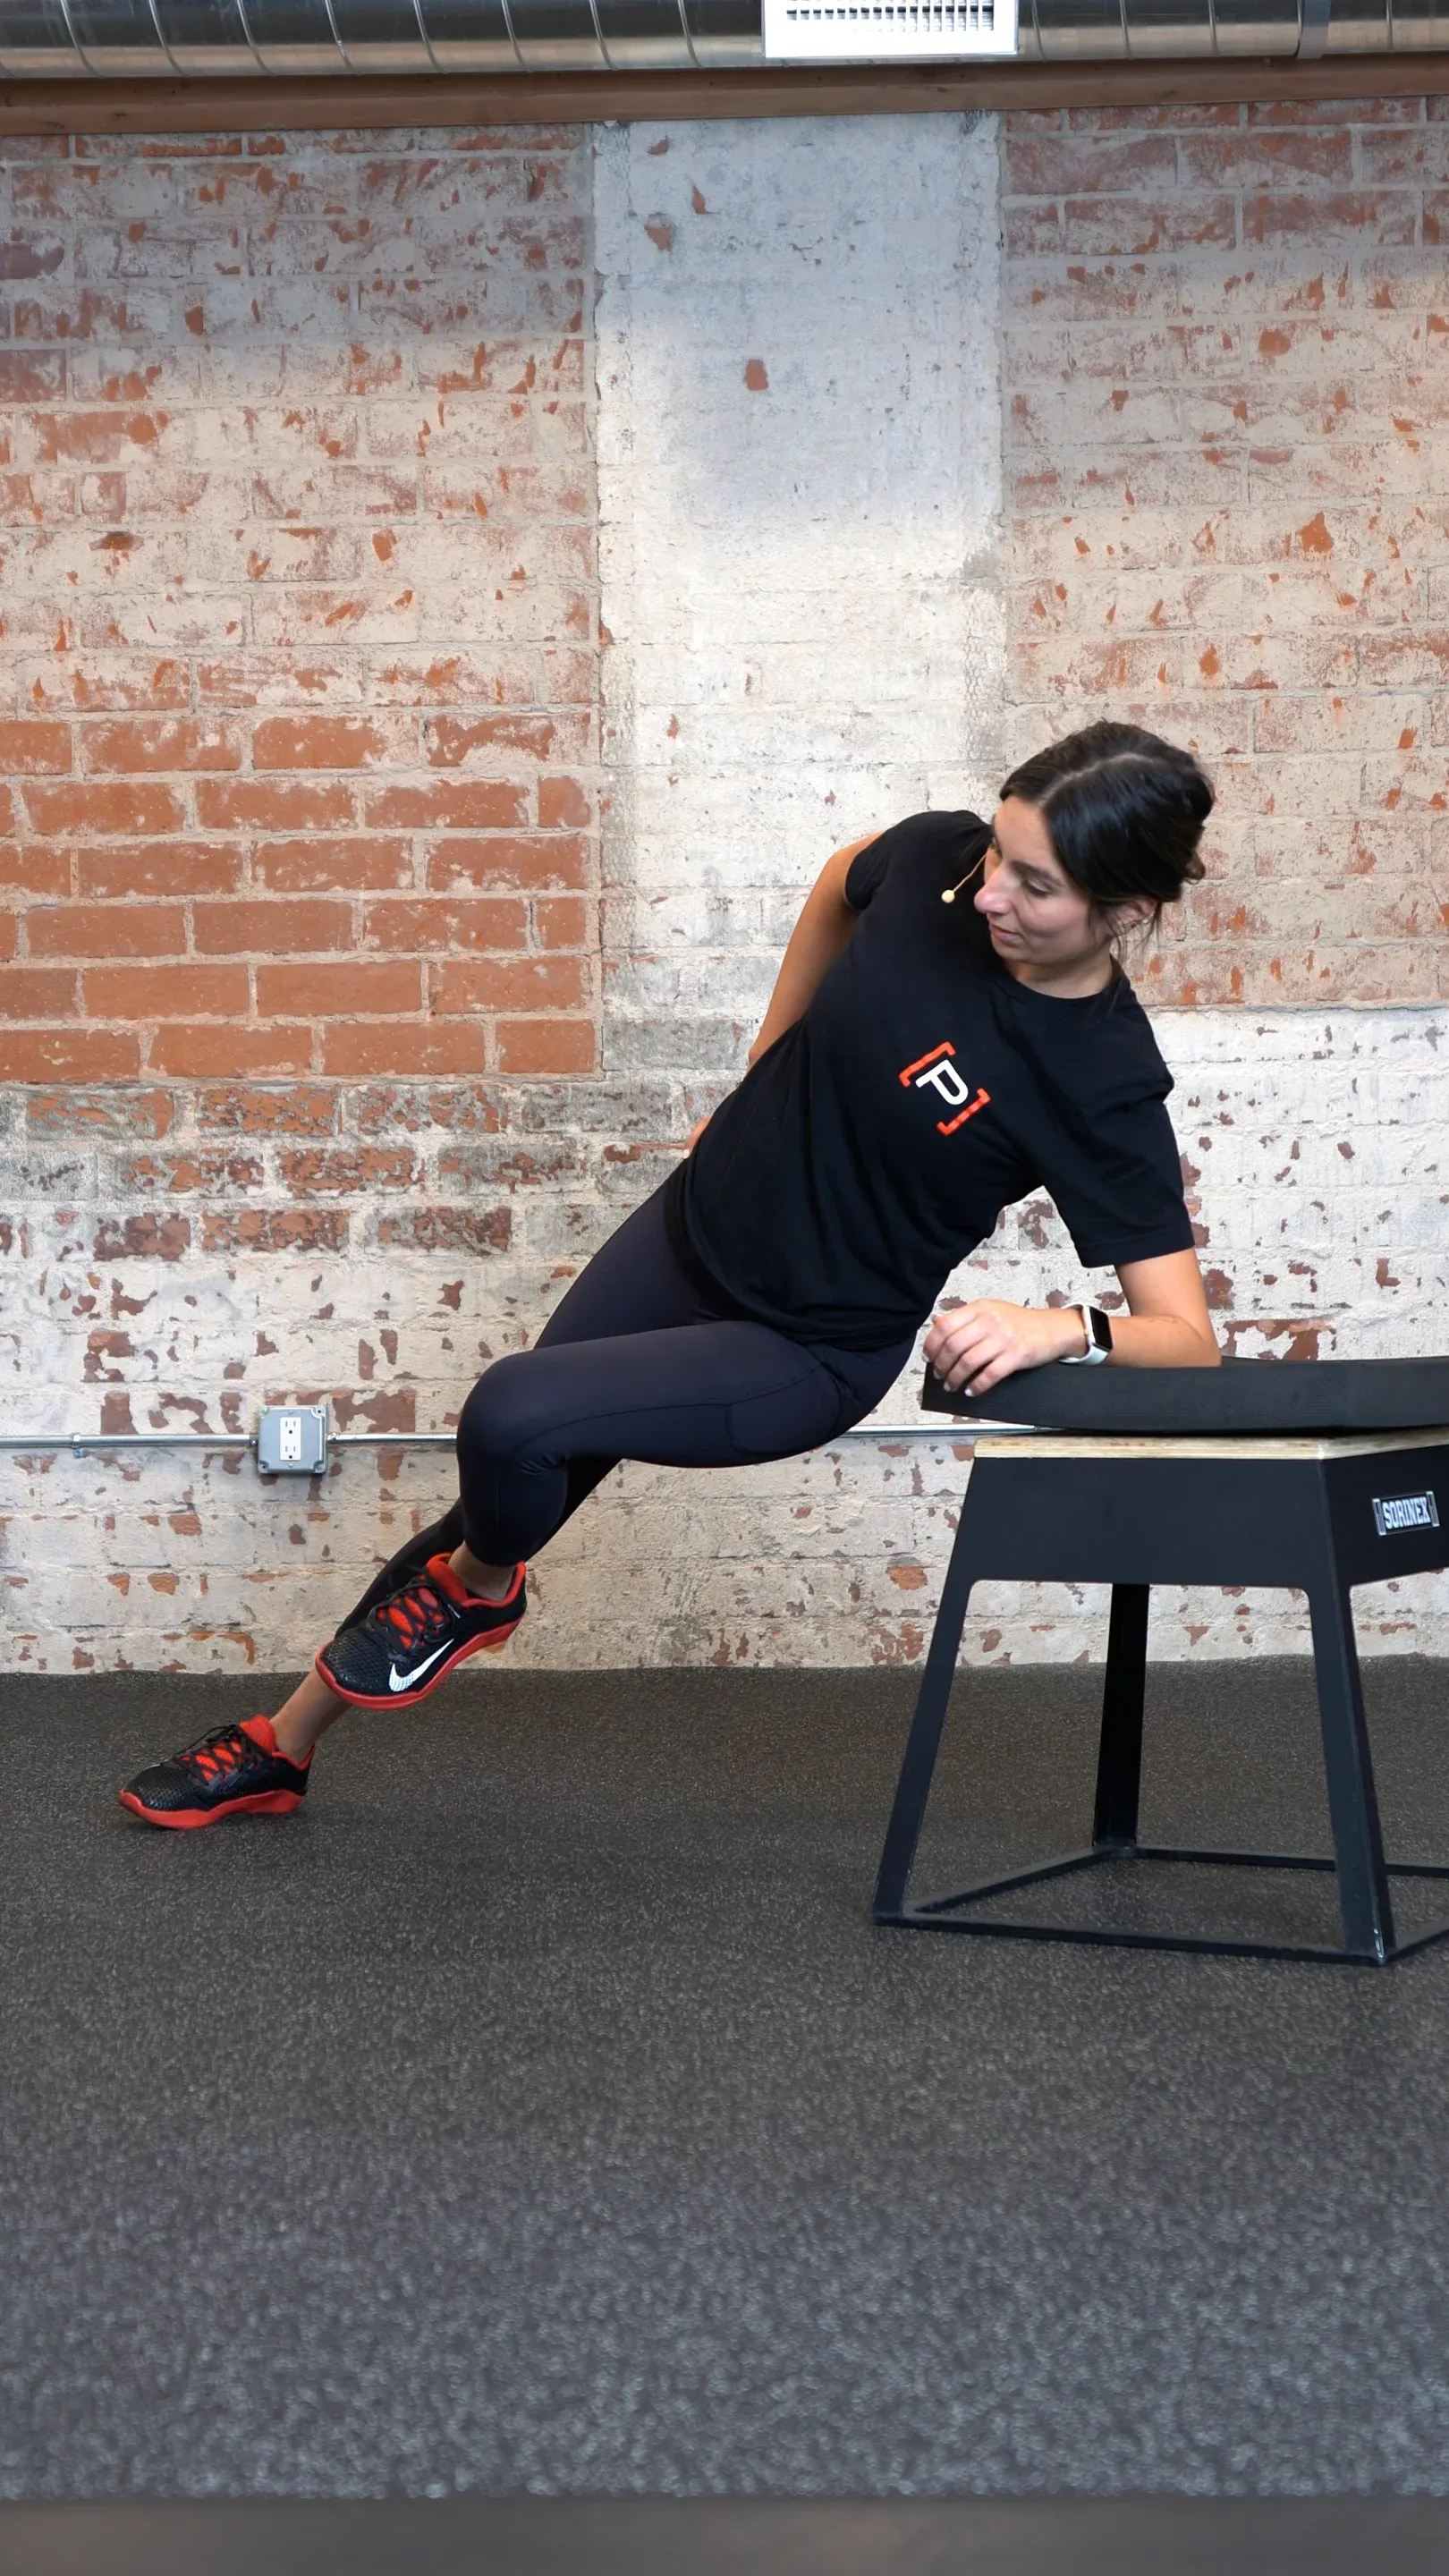
Incline Adductor Side Plank
View exercise instructions
- HOW: Set up an elevated surface that you will lean onto. The lower the surface the more challenging the plank will be. Place your elbow on the surface and make sure your feet, hips, and shoulders are in line with each other. Lift your bottom leg off of the ground, hold the plank position with your top leg and core muscles.
- FEEL: You should feel your inner thigh muscles on the top leg and core working.
- COMPENSATION: Don’t let your hips drop, keep everything in line with each other.
Unlike a traditional side plank that primarily targets the hip abductors, this variation targets the hip adductors. You accomplish this by first getting into a normal side plank position with your top foot in front of your bottom foot and your elbow on the chair. Engage your adductors and push your top foot hard into the ground. Then take your bottom foot off the ground so just your top leg is holding your body up in the air. The adductors are oftentimes a neglected muscle group when it comes to lower extremity training because let's be honest, it's not as sexy and fun as training muscles like the glutes or quadriceps! If you have groin or adductor discomfort, give the article below a read!
READ: GROIN PAIN PREHAB

Exercise 05 of 08
Exercise demonstration
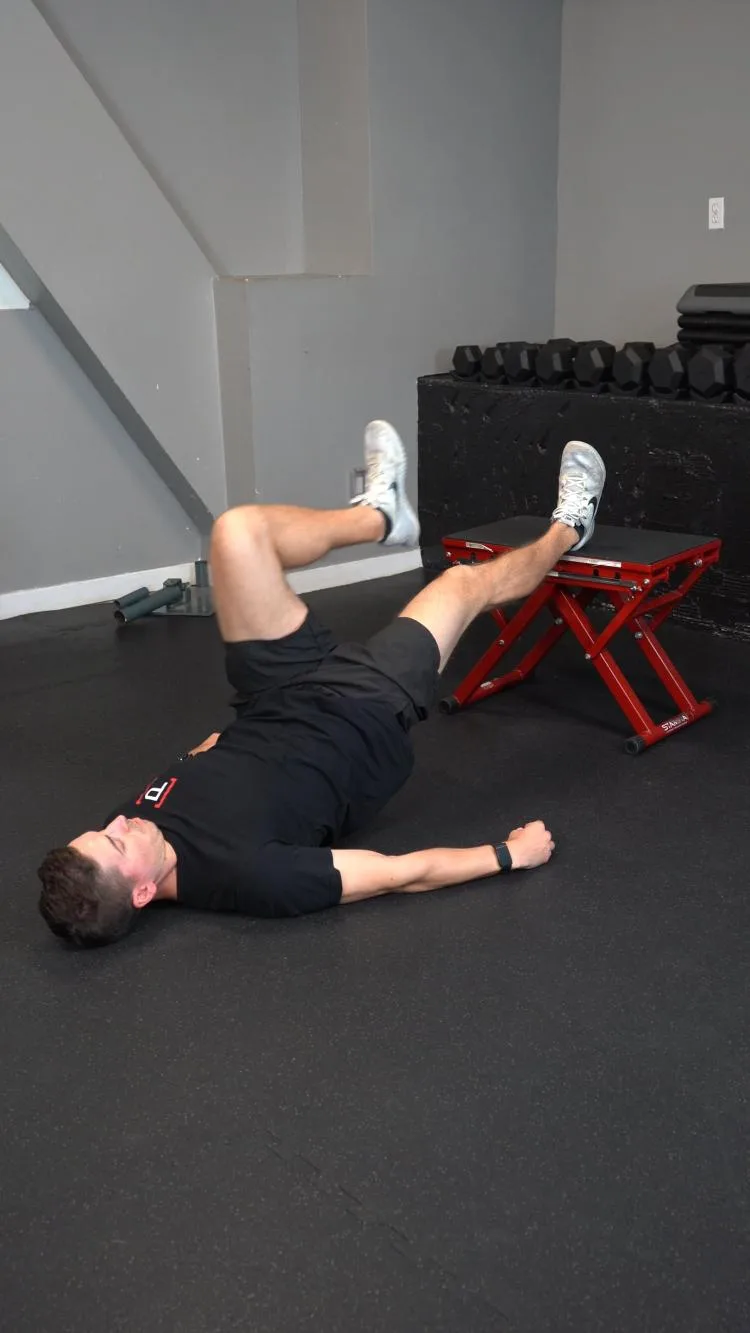
Single Leg Psoas March - Bridge
View exercise instructions
- HOW: Get set-up flat on your back with both feet supported on an elevated surface with the knees straight, slight bend is ok. While maintaining a flat low back, push into the elevated surface to bridge up and lift your hips off the ground. Your body should create a straight line from your shoulders to your feet. While you hold this position, bring one knee up towards your chest as if you were marching. Hold this position for a second, then slowly return to starting position and repeat.
- FEEL: You will feel the muscles behind your thigh, knee, and butt muscles working hard with this exercise. You may also feel your core and back muscles working too. You will also feel muscles in front of the hip on the side that is performing the marching.
- COMPENSATION: Limit excessive arching or rounding of your back, keep your hips level with the ground. Do not let your hips drop or rotate.
Psoas marches should be a staple in any hip flexor Prehab. Rarely in exercises do we actually try to target the hip flexors with strengthening exercises. Typically psoas marches are done standing to work against gravity and with a mini band around the toes to provide additional resistance. This is a more advanced variation because we must use our core and opposite side hip extensors and abductors to stabilize while using our hip flexors to lift our knee to our chest. However, because we are working across gravity in a supine position without any additional resistance, it may be a good place to start for someone who is in relatively good shape, but just experienced a hip flexor strain.
Exercise 06 of 08
Exercise demonstration
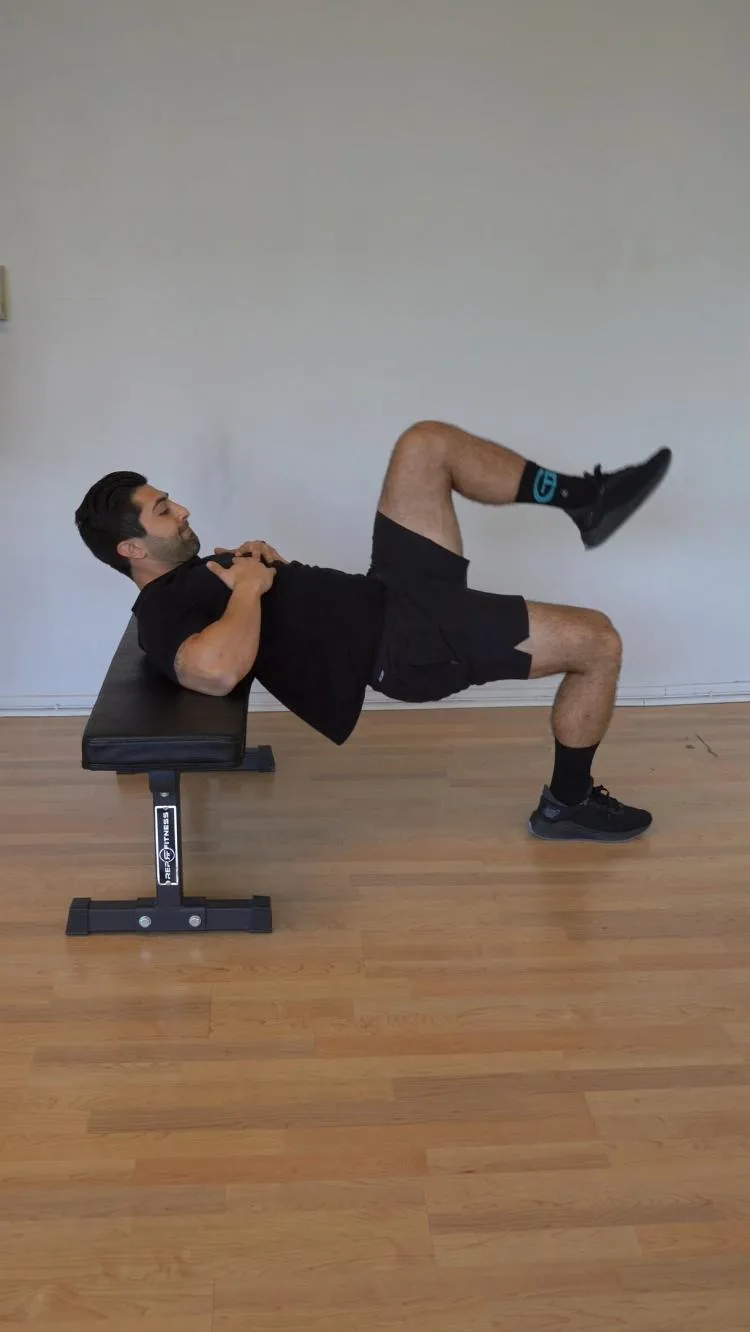
Single Leg Hip Thrust
View exercise instructions
- HOW: Begin with your mid-back against a bench or elevated surface. Bring one knee up towards your chest. While keeping your chin tucked, thrust your hips towards the ceiling. Focus on driving into the floor with your heel and tuck your tailbone (AKA posteriorly tilt your pelvis) at the top of the thrust. Slowly return back to the starting position and repeat.
- FEEL: You will feel the gluteal and hamstring muscles working with this exercise.
- COMPENSATION: Avoid arching with the lower back, allow a majority of this movement to come from the hips and pelvis.
The hip hinge is one of the fundamental movement patterns. Both hip thrusts and bridges are the same hip hinge pattern, the only difference is putting either your foot or your back on the chair! In both variations, using bodyweight is many times enough. But if you want to make each exercise even harder, try the single leg version of each. Placing your foot on top of the chair increases the knee flexion demand of the exercise, which makes it a great way to hit the hamstrings!
Exercise 07 of 08
Exercise demonstration
Sidelying Extra Range Hip Abduction

View exercise instructions
Popularized by booty fanatics across the world, the sidelying hip abduction is a great exercise to target the gluteus medius and the lateral hip as a whole. For an at-home setup, you'll want to position yourself on top of two chairs. Your elbow should be on one chair and your knee should be on the other. Raising yourself on chairs allows you to go into a greater range of motion at your hip, maximizing the hypertrophic stimulus!

Exercise 08 of 08
Exercise demonstration
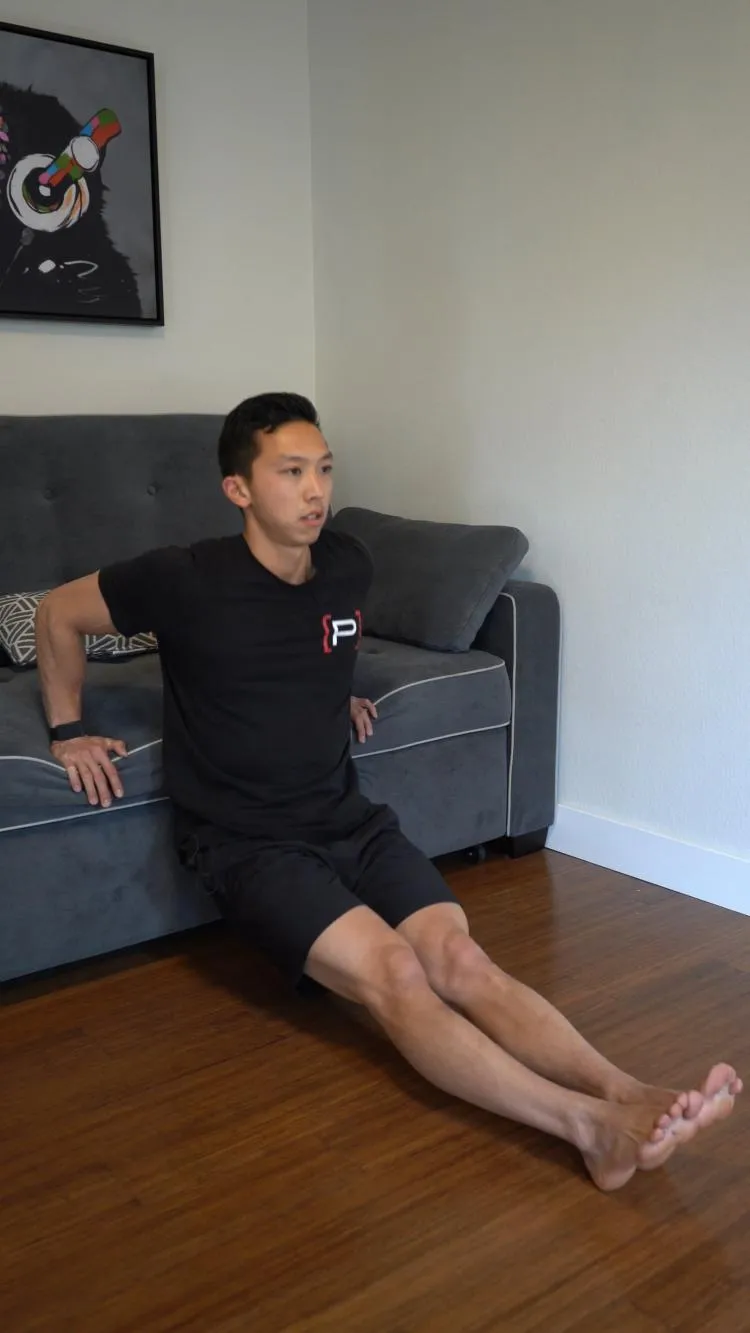
Dip
View exercise instructions
- HOW: Start with your hands supported on an elevated surface like a couch or bench behind you at your sides. With your hips unsupported in the air, but your feet supported on the ground, lower your hips down towards the ground by letting your elbows bend and shoulders shrug. Lower down as far as you feel comfortable with, then press through your hands to straighten your elbows and return to starting position. Repeat
- FEEL: This should feel like an upper body workout, specifically your triceps, shoulders, and shoulder blades. The closer your feet are to you, the easier the exercise is.
- COMPENSATION: Try to keep your upper torso still in terms of not leaning back or forward excessively. Move slow and controlled, think time under tension is better here than speed. Be mindful of your elbow flare, try to keep your elbows tucked back as long as it feels comfortable for you.
Dips on a chair are a great use of body weight to target the triceps. However, there are concerns that the shoulder extension and internal rotation of the shoulder joint can push the head of the humerus forward, possibly leading to anterior instability or even subluxation. While these claims are definitely valid, the role of the rotator cuff is to stabilize the head of the humerus within the glenoid fossa of the scapula, preventing this anterior translation – even at extreme ranges of motion. Thus, in order to properly perform this exercise, ensure that you have:
- Adequate shoulder extension and internal rotation ROM
- Strong scapular stabilizers and rotator cuff muscles
- No history of anterior shoulder instability or “shoulder dislocations”
Closing Thoughts
No matter where you are, as long as you have you and your body, you can engage in exercise! We hope this article has provided you with some examples of how you can continue to engage in exercise from your own home. Moreover, if you are looking for a more specific program for full body fitness from your home, check out the link below!
Prehab Fitness Program Home Edition
Fitness is not about using such a high intensity that you are unable to get off the floor afterward. We are all about hard work, however, we want to make sure you are able to work out across the lifespan both safely and effectively. The number one reason why people no longer participate in an exercise program is due to injury, let's prove that statistic incorrect by using a fitness program with the intended goals of getting you in shape while avoiding injury! To do so, the first 4 weeks are meant to load your tissues to create a movement base this ready to take on the next 8 weeks. Let's also make sure that we are not just addressing the physical you but are helping you become healthier by giving you methods to decrease your internal load via positive self-talk and gratitude practices.
About The Author
Michael Lau, PT, DPT, CSCS
Prehab Co-Founder & Chief Product Officer
 Michael was born and raised in Northern California but now currently resides in Sunny SoCal ever since attending the University of California, Los Angeles as an undergraduate majoring in physiology. After his undergraduate studies, he received his Doctorate in Physical Therapy from cross-town rival the University of Southern California. As a licensed physical therapist with a strong background in strength and conditioning, Michael likes to blend the realms of strength training and rehabilitation to provide prehab, or preventative rehabilitation, to his patients. A common human behavior is to address problems after they become an issue and far often too late, which is a reactionary approach. He believes the key to improved health care is education and awareness. This proactive approach-prehab-can reduce the risk of injuries and pain in the first place. He is a huge proponent of movement education and pain science. Clinically, he has a special interest in ACLR rehab and return to sport for the lower extremity athlete.