


On this page 6 sections
Your guide
What you'll learn
Sciatica, is a term that is often used to describe any type of low back, hip or leg pain. You may have heard people describe back or hip pain as their “sciatic acting up again”. Despite its prevalence, many people suffering from hip, buttock, and leg pain are often shocked to find out that the root cause of their pain is not local to that area but may originate much higher up in their low back. This article aims to explain what exactly sciatica is, along with the key principles & exercises one can use to address their sciatic when dealing with these symptoms.
What is Sciatica?
The Sciatic nerve is the longest nerve in the human body, arising from your L4 to S3 nerve roots and traveling all the way down the back of your leg with branches terminating in the foot. On this long pathway down your leg there are many opportunities for your sciatic nerve to become irritated. One of the most common areas is right at the start of the pathway in your L4-S3 nerve roots. These roots can become irritated in a variety of ways including compression, overload, or even through a traumatic incident.
The term Sciatica is often used as a diagnosis, however, it is more of a symptom describing pain down the back of your leg which originates from your back (1). Another term to describe this type of pain is lumbar radiculopathy, which is inclusive of pain originating from any of the nerves that extend down your leg. Although lumbar radiculopathy is more commonly used by clinicians, the term sciatica is still extremely prevalent (2). The description & treatments detailed in this article although geared toward sciatica, apply to almost any lumbar radiculopathy.
Signs of Sciatica
While sciatica is extremely common there are many ailments of the hip and leg that are local in their origin and you will want to be able to differentiate between those and sciatica. Some telltale signs of sciatica include a description of the pain as any of the following (2):
- Burning
- Searing
- As a jolt of electricity
- As a dull ache
- As a nagging persistent ache
Other telltale signs include:
- Pain that extends across multiple body regions of the leg (from the hip down to the calf for example)
- Pain that seems to be worse with prolonged sitting or inactivity
- Pain in the area of a muscle that is not reproduced by activating that muscle
One of the clearest ways to diagnose sciatica is through a Seated Sciatic Neural Tension Test AKA a Slump Test. This test is performed very simply by sitting at the edge of a chair and taking the following steps in order:
Exercise 01 of 07
Exercise demonstration
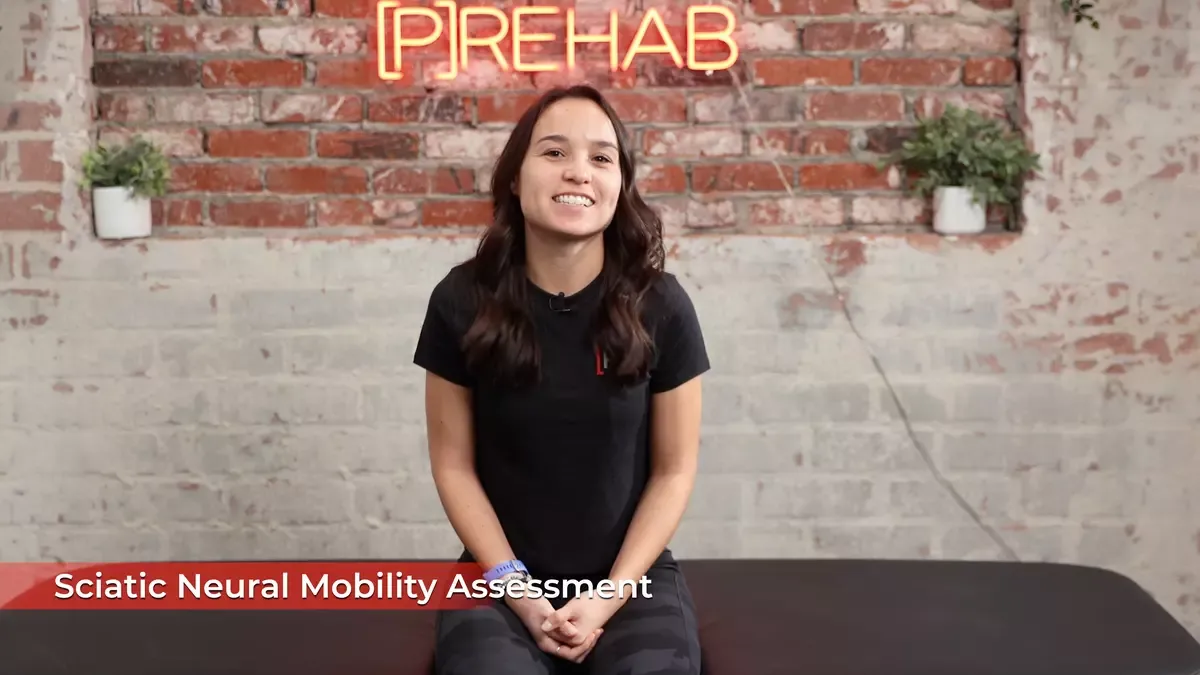
Sciatic Neural Mobility Assessment
View exercise instructions
- The sciatic nerve supplies many of the muscles of our lower leg through its branches and those innervations.
- To test its mobility, start in a seated position. From here, clasp your hands behind your back and slump down. Bring your chin down towards your chest and straighten your left leg. From here, bring your toe up towards you and note where you feel tension. Repeat on the other side.
- Take note of what you feel with this assessment and where you feel it side to side. If you straighten your leg and feel an uncomfortable tension through the back of the leg, stop there and do not worry about bringing the toes up toward you.
- Prehab Goals & Normative Values: Goal is for this assessment to feel symmetrical side to side.
- Take the assessment, write down your score, and track your progress throughout the program.
- 1) Rounding your head and back - assuming a slouched position
- 2) Straightening and lifting your leg
- 3) Pulling your foot off the leg that is straight toward your face
- 4) Take note of where you feel the tension side to side
If this position reproduces or worsens the pain down your leg, and if the pain is relieved by releasing any of the above positions, you are likely dealing with sciatica.

In most cases, sciatica can be treated with exercise and movement however there are a few circumstances in which you should immediately contact a medical provider.
These include:
- Any changes in bowel or bladder control.
- Worsening muscular weakness in any area of your body
- Other signs of neurological deficits include clumsiness, balance issues dizziness, or repeated falls.
Fortunately, these more serious symptoms in those dealing with sciatica are extremely rare. In fact, in a vast majority of cases of sciatica symptoms improve over time and improve more rapidly by exercise and activity modification.
So I’ve got Sciatica, what are exercises to help?
The first and most important rule of dealing with sciatica is this: Keep moving! Research has shown that bed rest and immobility not only can lead to the worsening of sciatica symptoms but can also decrease your movement capacity and make it harder to get back to your previous level of activity. Continuing to move promotes blood flow, creates space for the nerve to move through, and promotes nerve mobility.
READ: HOW TO RELIEVE NERVE PAIN; UNDERSTANDING NEURODYNAMICS

Now this doesn’t mean we blindly push into painful positions or keep working out at the same level we were before these symptoms came on regardless of pain. What it means is we move in a way that keeps our pain manageable, without making it worse or leading to increased dysfunction, and without stopping moving altogether.
One of the best things you can do early on is establish a directional preference (3). Many times, patients with sciatica respond positively to either lumbar flexion or lumbar extension. You can investigate this by performing simple seated pelvic tilts. If moving into an anterior pelvic tilt (which leads to lumbar extension) relieves your symptoms by decreasing your pain or causing those symptoms to move higher up your leg (centralization) you should consider adding in more extension-based exercises like standing lumbar extension or prone press-ups.
LISTEN: LOW BACK DISCUSSION WITH THE [P]REHAB GUYS

If posterior pelvic tilts (which lead to lumbar flexion) lead to centralization or improvement of symptoms, you will likely want to add in more flexion-based exercises, such as the child’s pose or happy baby pose.
It is important to note that your directional preference may change from day to day and that is completely normal, but establishing this preference each day allows you to understand your body’s response, improve your symptoms, and give you control over these symptoms.
Exercise 02 of 07
Exercise demonstration
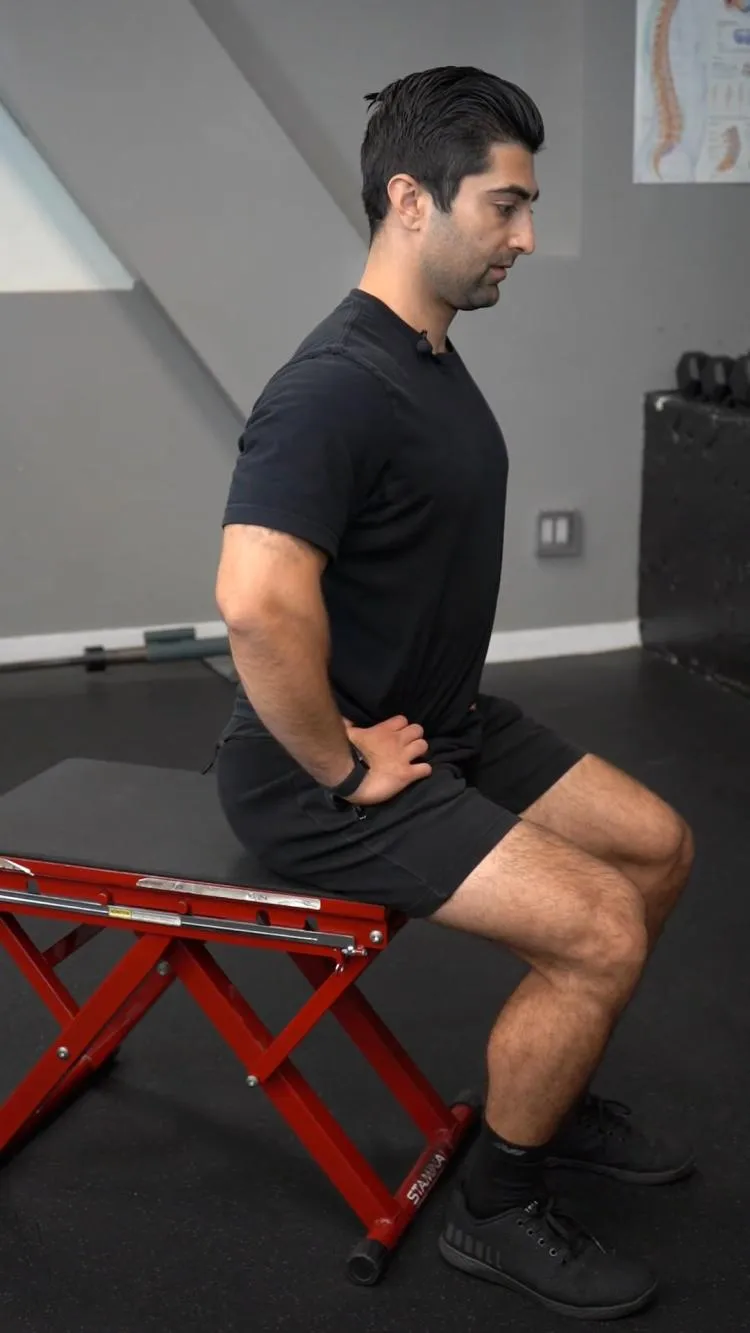
Seated Pelvic Tilt
View exercise instructions
- HOW: Start in a seated position with your knees out from your hips and your feet underneath your knees. Begin to draw your belly button in rotating your hips forwards. Only allow movement in the lower abdominal area as you rotate your hips forward. Perform in a slow and controlled motion. Then, reverse the motion and roll your hips backwards. Pretend your have a tail and you are alternating tucking the tail between your legs and then behind you,
- FEEL: You should feel your deep hip and core muscles working.
- COMPENSATION: Only allow movement in the pelvis area, not in your legs or upper back.
Perform the above exercise to explore whether lumbar flexion (posterior pelvic tilt) or lumbar extension (anterior pelvic tilt) feels better for you and your symptoms, be sure to lean into the position that feels better and slowly work on introducing the other position as you can tolerate.
Exercise 03 of 07
Exercise demonstration
Prone Press Up

View exercise instructions
- HOW: While laying on face down place both elbows on the floor at shoulder width. Driving into the floor with both of your forearms lift your chest up, creating an arch in the back. The closer your elbows are together, the higher you will be able to bring your chest up. If you can tolerate even more of a stretch, straighten out your elbows in front of you then push your chest up. To regress this stretch, simply widen your stance on your forearms to minimize how high up you push yourself up.
- FEEL: As your back arches you may feel a stretch in your lower back, make sure it doesn’t increase any back discomfort. You will additionally feel a stretch in the abdominal muscles in the front of your stomach.
- COMPENSATION: Keep your hips on the ground as you bring your chest up.
If lumbar extension feels best, trying some of the above exercises may feel good! Give it a try!
Sciatic Nerve Mobility:
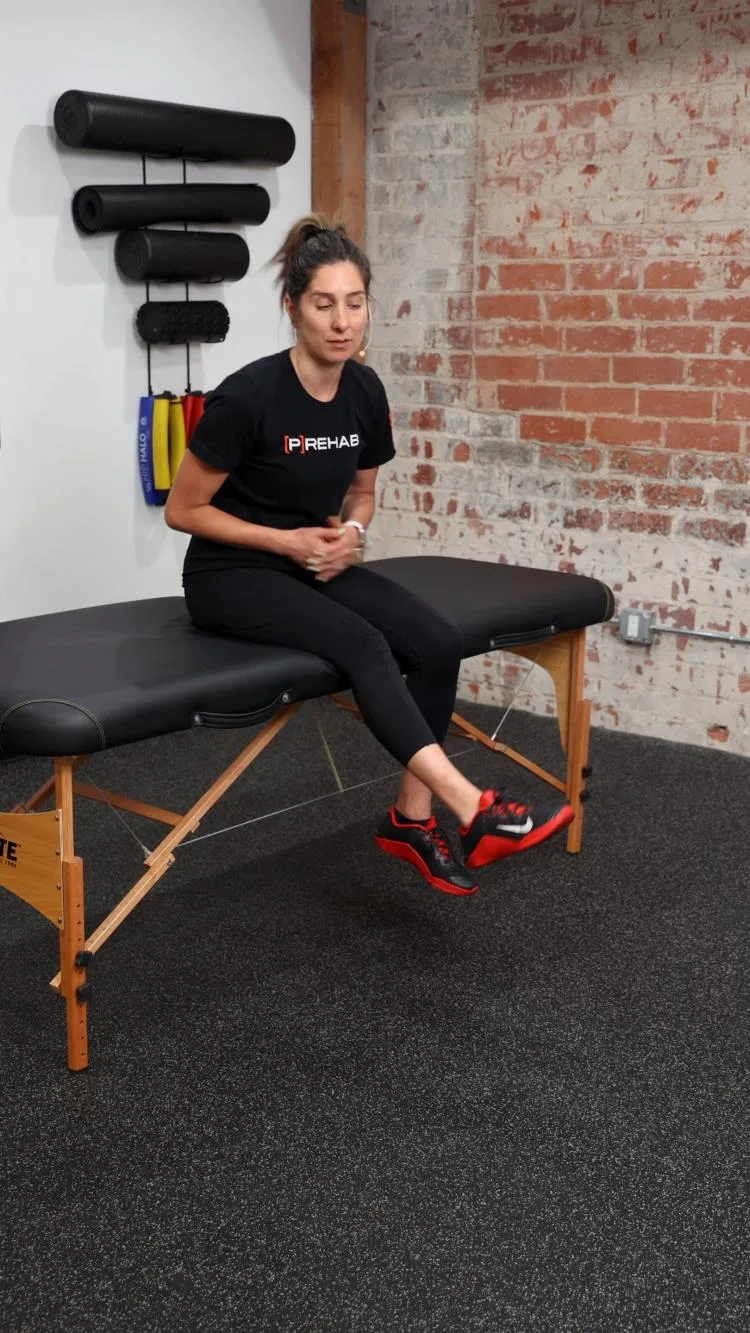
Another critical piece of sciatic nerve treatment is addressing nerve mobility. This starts with a sciatic nerve slider in which you are mobilizing the sciatic nerve without placing a painful level of tension on it. Since the nerve crosses you’re the joints of your spine, hip, knee, and ankle. You can perform a nerve slider by slumping into lumbar flexion, straightening your leg, and pointing your toe, thus moving your knee across these joints without excessively tensioning it.
Exercise 04 of 07
Exercise demonstration
Seated Sciatic Nerve Glider - Leg Only
View exercise instructions
- FEEL: You should feel a comfortable stretch through the back of your knee and even into your calf musculature.
- COMPENSATION: Be sure to point your toes as you straighten your leg and to pull your toes up as you bend your knee. This will help create gliding of the sciatic nerve vs tensioning.
As this gets more comfortable you will want to progress to sciatic nerve tensioners which are performed as above but by pulling your foot up toward your face at the end - placing a greater amount of tension across the sciatic nerve (4). While this may bring on some pain, it can also serve as a desensitization exercise. Thus the goal of the tensioner is to reproduce the nerve pain momentarily, then shut that pain off upon returning to the starting position. By repeating this exercise and allowing the pain to return to baseline in between repetitions, you are desensitizing the nerve and decreasing its irritability.
Exercise 05 of 07
Exercise demonstration
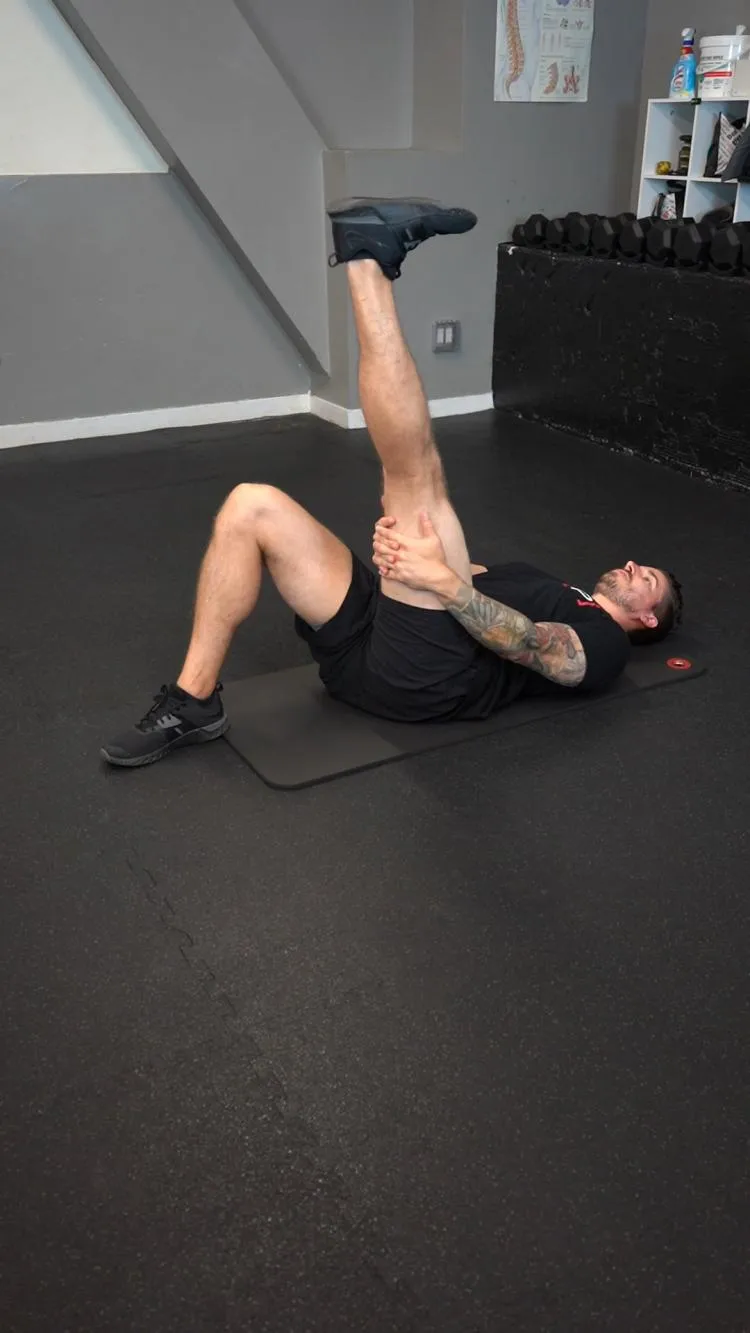
Supine Sciatic Nerve Tensioner
View exercise instructions
- HOW: Get set up laying flat on your back. On the side you plan to mobilize - hug that knee towards your chest and support that thigh with your hands wrapped behind your knee. To perform the exercise, kick your knee straight while simultaneously pointing your foot and toes up, reverse the motion at your knee and foot, and repeat. View video for more tips and modifications
- FEEL: You should feel a stretch/pulling sensation in the back of the leg you’re moving. You may feel this from your low back all the way down into your foot.
- COMPENSATION: Try to keep the rest of your body still and your knee in the same position that you start in. View video for other tips and details.
In addition to these key elements, you will also want to incorporate hip mobility exercises as well as a robust progressively overloaded strength program. Since sciatica can often result in tissues being irritated from an overloading incident, we want to make sure we are building up the strength of the tissues in your core, low back, hips, and legs to prepare those tissues for the rigors of everyday life. Strengthening exercises of the glutes, core, and back muscles are some of the best ways to make sure you are building a strong resilient lower back (3).
Exercise 06 of 07
Exercise demonstration
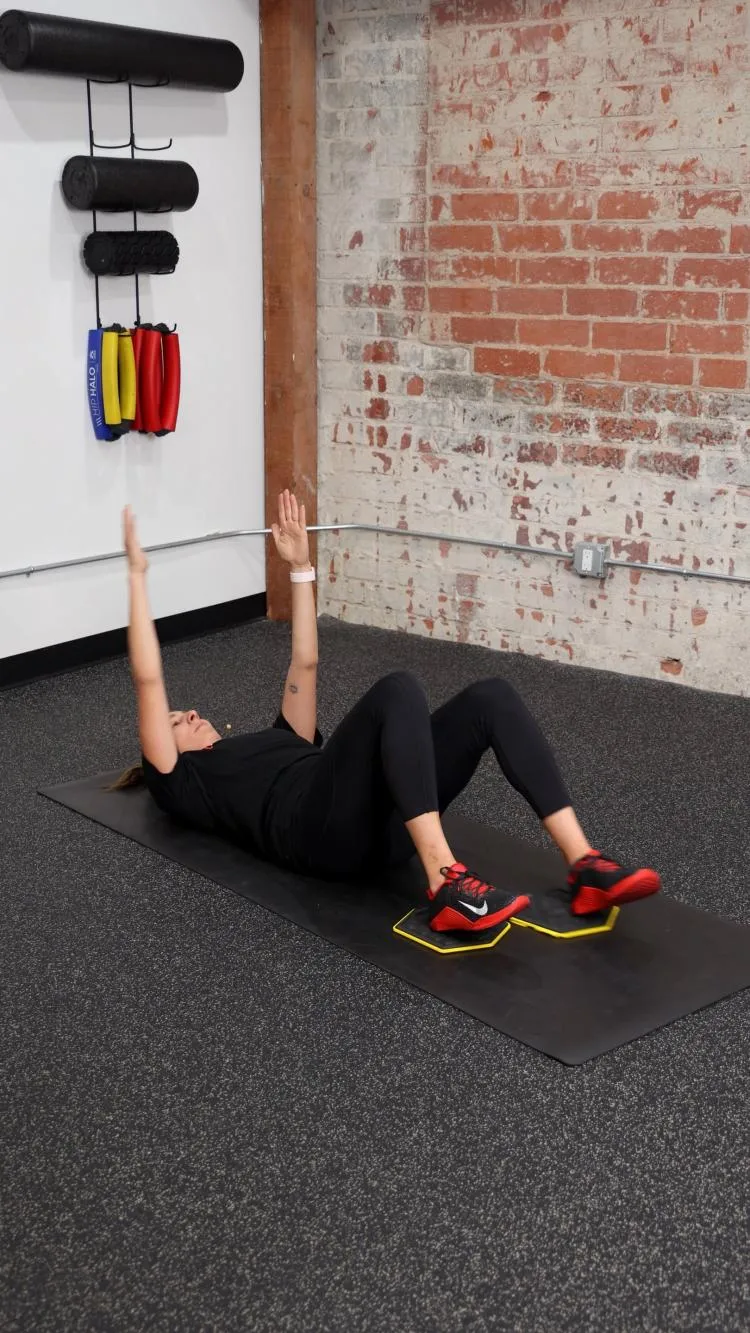
Dead Bug - Heel Slide
View exercise instructions
- FEEL: You will feel your core muscles working as you extend your leg and reach overhead.
- COMPENSATION: Be sure to keep your core engaged as your reach overhead and extend your leg! The farther away you reach, the more your back is going to want to arch! Avoid this, keep your core engaged and strong!
Starting with a dead bug such as this and progressing to a dead bug such as the below exercise will help with strengthening the supportive muscles of your core, lower back, and hips.
Exercise 07 of 07
Exercise demonstration
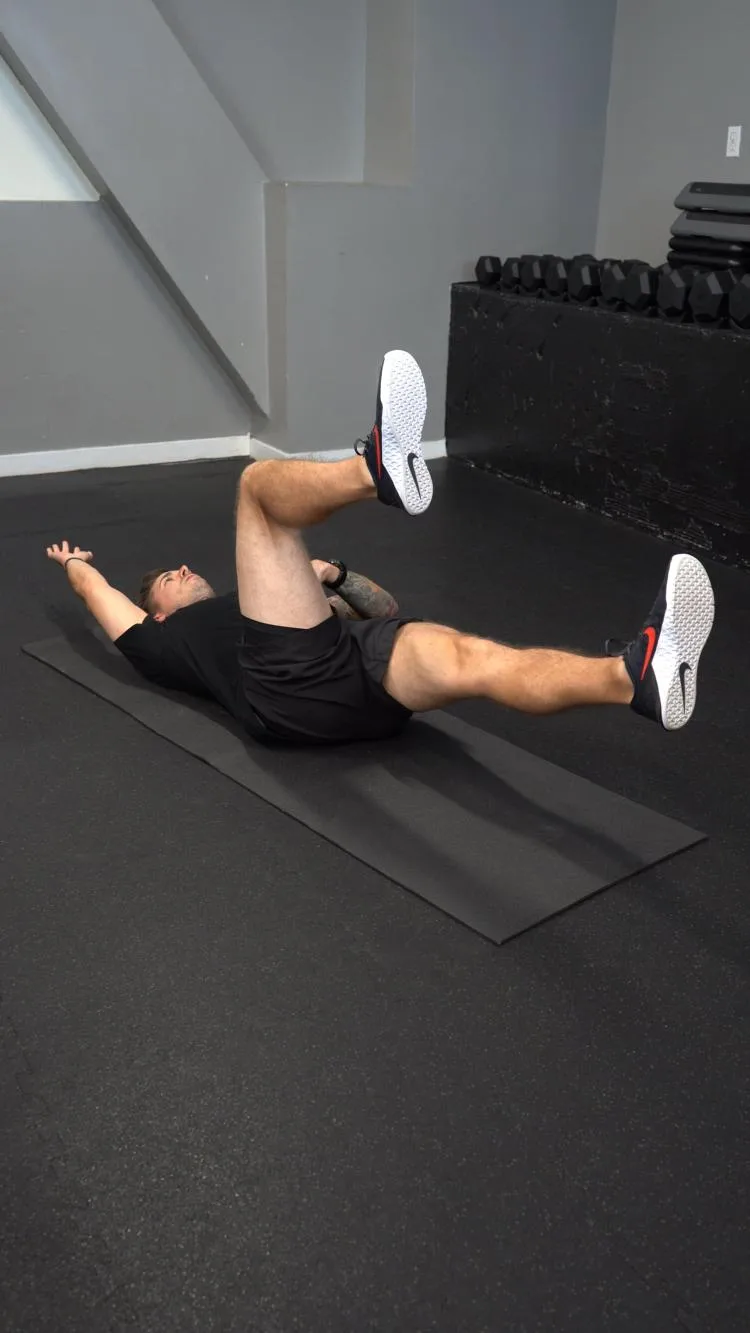
Dead Bug
View exercise instructions
- HOW: Start this exercise on your back in a 90/90 position, with your knees over your hips and your arms in front of your shoulders. Keep the small of your back pushed into the floor by activating your core. While maintaining core activation drop one leg and the opposite arm towards the floor. The closer you drop the arms and legs towards the floor the more challenging this exercise will be. Return to starting position and repeat on the opposite side.
- FEEL: You should feel the abdominal muscles engaging while you perform this exercise.
- COMPENSATION: Do not let your low back arch
Closing Thoughts:
Nerve pain can be really scary, but you should know that a majority of people recover from nerve pain without any kind of medical procedure or long-term disability. Meaning: This will get better!
LEARN MORE ABOUT OUR LOW BACK REHAB PROGRAM
Some of the keys to helping it get better faster include:
- Continuing to move
- Establishing a daily directional preference of lumbar flexion or extension
- Performing nerve mobility exercises starting with sliders and progressing to tensioners
- Maintaining your hip mobility to relieve excess stress on your lower back
- Strengthening your core, back, and hip muscles with progressively overloaded exercises.
References:
- Miller KJ. Physical assessment of lower extremity radiculopathy and sciatica. J Chiropr Med. 2007;6(2):75-82. doi:10.1016/j.jcme.2007.04.001
- Valat JP, Genevay S, Marty M, Rozenberg S, Koes B. Sciatica. Best Pract Res Clin Rheumatol. 2010;24(2):241-252. doi:10.1016/j.berh.2009.11.005
- Delitto A, Erhard RE, Bowling RW. A treatment-based classification approach to low back syndrome: identifying and staging patients for conservative treatment. Phys Ther. 1995;75(6):470-489. doi:10.1093/ptj/75.6.470
- George SZ, Fritz JM, Silfies SP, et al. Interventions for the Management of Acute and Chronic Low Back Pain: Revision 2021. J Orthop Sports Phys Ther. 2021;51(11):CPG1-CPG60. doi:10.2519/jospt.2021.0304
- Delitto A, George SZ, Van Dillen L, et al. Low back pain. J Orthop Sports Phys Ther. 2012;42(4):A1-A57. doi:10.2519/jospt.2012.42.4.A1
About The Author
Tommy Mandala, PT, DPT, SCS, OCS, CSCS
[P]rehab Writer & Content Creator
 Tommy Mandala is a Doctor of Physical Therapy, Board Certified Clinical Specialist in Sports & Orthopedics, and Certified Strength and Conditioning Specialist in New York City. He is the founder of ALL IN ACL, a digital coaching platform dedicated exclusively to helping ACLers return to the life they had before their injury with full confidence in their knee. Prior to that, he worked in the sports clinic at Hospital for Special Surgery, the #1 Orthopedic Hospital in the country. While there, he had the opportunity to hone his skills as an ACL specialist working closely with world renowned surgeons and evaluating patients from all over the world. He completed his sports residency training at the University of Delaware where he had opportunities to work with many of their Division I sports teams as well as the Philadelphia 76’ers NBA G-league affiliate, the Delaware Blue Coats. He also trained at Champion Sports Medicine in Birmingham, Alabama where he had the opportunity to learn from researchers in the American Sports Medicine Institute. Currently, Tommy works exclusively with ACLers through his digital coaching model. While many of these clients are athletes, Tommy works with ACLers of all different abilities helping them to build the strength they need to overcome this unique injury. One of his favorite aspects of his job is taking active clients who have never been a “gym person” before and showing them the amazing things that happen when they learn to strength train.