


On this page 6 sections
Your guide
What you'll learn
When it comes to mid back and scapular pain, nothing beats a mid back prehab program with tons of thoracic spine mobility and stability work. Mid back pain can be caused by a variety of structures in the mid back itself like the thoracic spine, ribs, or trigger points in the upper back muscles. Furthermore, the pain could even originate from other regions, not in the mid back like the neck or shoulders. That's a lot of potential pain generators and triggers! Making matters even more complicated is that it's oftentimes difficult to recreate a "trigger". In physio terms, a trigger is something that causes your familiar pain. Meaning if you ask yourself the question, "what typically causes my mid-back pain?" The answer for many with mid-back pain is typically something vague and difficult to pinpoint. "Uh, this weird position I put my arms in... it just aches... it's always there, etc." Don't worry, this is common! But because of this conundrum, you can never go wrong with a holistic mid back prehab program focused on improving thoracic spine mobility and strength and above all else, keeping moving! Follow along in this article as you learn the best exercises for mid back pain!
Mid Back Pain? Desensitize Your Triggers and Move!
If you currently have mid back pain, before we Prehab - we must rehab. The goal of rehab is to desensitize your mid back to those "triggers" we talked about earlier. And even if you don't have any clear movement-based triggers, introducing general mobility into the mid back in a graded manner is always step one before progressing to more advanced exercises!
Open Up Your Stiff Mid Back
Do you feel that you constantly have mid back stiffness and/or discomfort? If so, we have the solution for you! This mid back program is the ultimate program that will teach you how to open up that stiff mid back of yours.
Mobility Exercises For Mid Back Pain
The cat cow is my go-to for desensitization. It's a movement that is inherently easy to control if you have pain. And if you don't, it just simply feels good. For mid back pain, the key is to bias the mid back region during the cat cow movement rather than the low back region.
Exercise 01 of 06
Exercise demonstration
Cat Cow Thoracic Spine Bias
View exercise instructions
- HOW: Get set-up on your hands and knees, hinge back at your hips until your butt and heels are touching or close to it- this will round your low back slightly. While keeping the rest of your body still, round your mid back followed by slowly arching your mid back. Repeat
- FEEL: When you round your back, you should feel like you’re pushing your chest away from the ground by pushing through your hands. You should also be performing a posterior pelvic tilt with rounding your back, thus your back looks like a cat. When arching your back, you should feel like your chest is dropping towards the ground, but you don’t want to bend at your elbows, keep your arms straight. You should also be performing an anterior pelvic tilt with arching your back, thus your back and head make the shape of a camel.
Exercise 02 of 06
Exercise demonstration
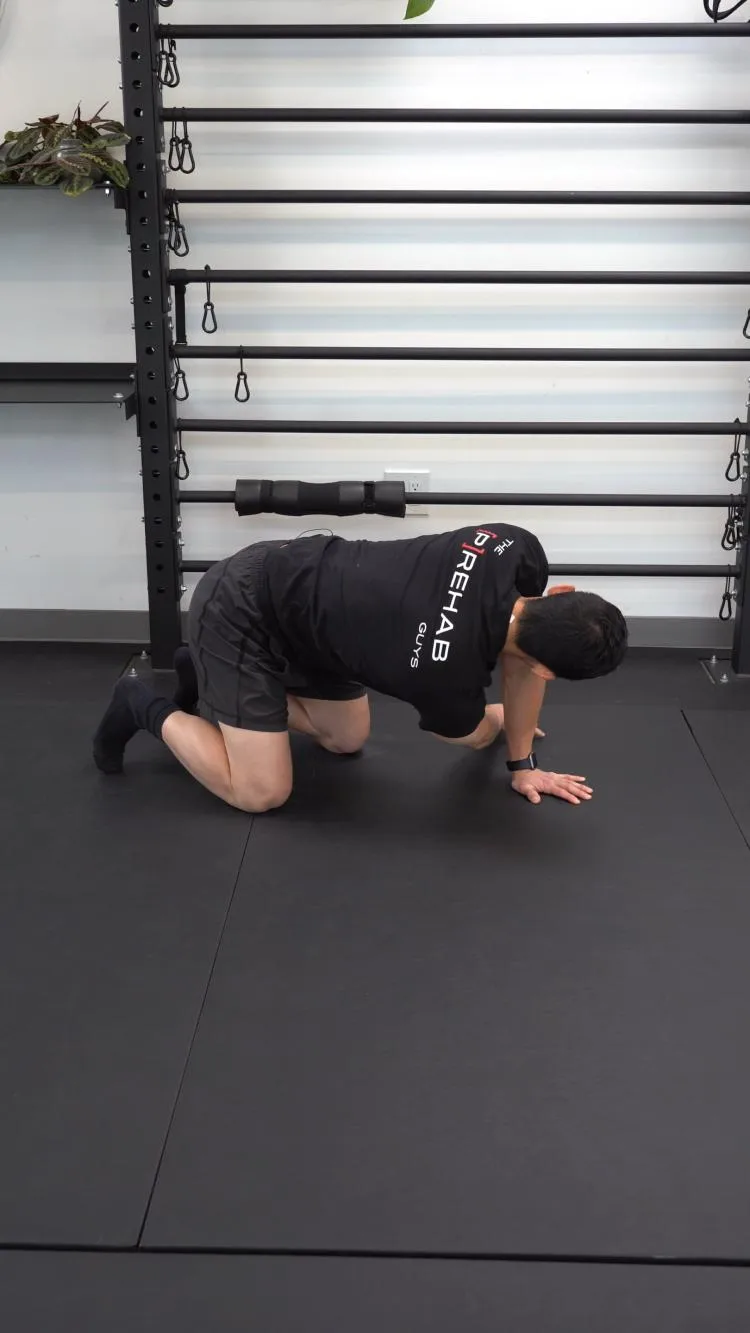
Quadruped Thread The Needle To Open Book
View exercise instructions
- HOW: Start in a quadruped position with your hands and knees on the ground. Slowly rotate to one side by bringing your arm under your body and through to the other side. To increase the stretch, you can "crawl your fingers" and exhale at the end of the stretch. Then reverse the rotation and rotate the other direction, exhaling at the top. You can use your eyes to increase the stretch
- FEEL: You should feel a nice and gentle stretch in the middle region of your back when you perform this exercise.
- COMPENSATION: Make sure to keep your hips on top of your knees, or even sink your hips back more towards your ankles. Do not let your hips come forward like in a modified plank position
Thread the needle is an all-time winner when it comes to the best exercises for mid back pain. This exercise combines a thread the needle with an open book exercise to hit rotation in both directions. The secret to unlocking more mobility through your thoracic spine is to use your eyes when turning! Notice how I look in the direction I want to turn. You'll find yourself getting more degrees of rotation in any exercise by guiding yourself with your eyes!
Also, notice how I use my fingers to "get a little extra rotation" during the thread of the needle. Try to get as much rotation actively as you can on your own first. Then, use your fingers to gain a couple more degrees of rotation as you exhale and relax your body. You can also use a foam roller like in this video to get more rotation.
If putting weight through your shoulder/wrist is an issue, a simple solution is to lie on your side and perform just the side-lying open book exercise. You'll want to perform it on both sides.
LISTEN: IMPROVING POSTURE WITH PREHAB

Exercise 03 of 06
Exercise demonstration
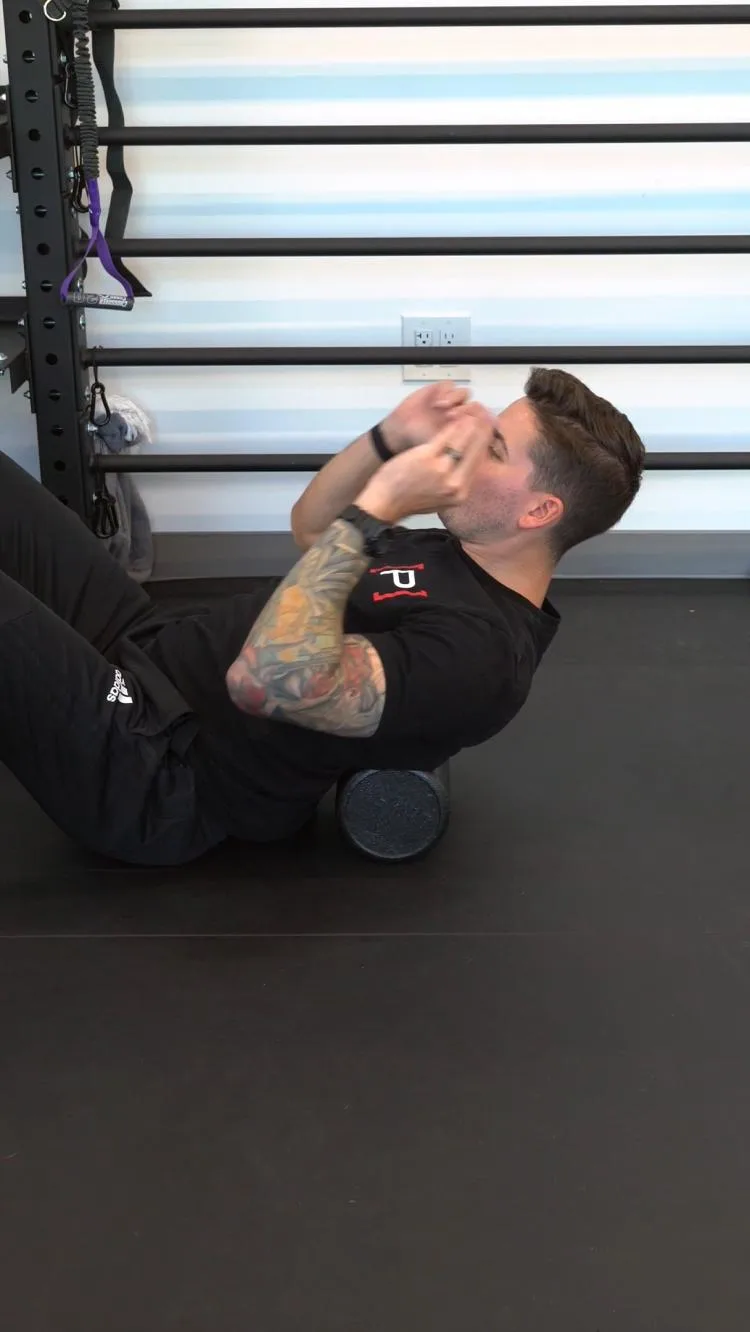
Thoracic Spine Foam Rolling
View exercise instructions
- HOW: Get set-up with your butt supported on the ground with a foam roller supporting your mid back. The goal is to make a ‘fulcrum’ that we can use to mobilize your mid back. Position the foam roller in your mid back and drive the upper half of your back “over” the foam roller while exhaling. Move the object to different areas of your mid back to mobilize multiple segments.
- FEEL: You should feel moderate amounts of pressure in your mid back. If you feel a “pop”, that is totally normal and okay.
- COMPENSATION: Do not put the foam roller on your lower back, just your upper back. Keep your core engaged and do not overly arch in your lower back.
If you don't have a foam roller, simply use a towel roll against a chair. This is a great alternative if you have issues getting up and down off the ground as well!
4 Exercises to IMPROVE Your Stiff Mid-Back (Thoracic Spine Mobility)
Mobilize - Then Strengthen
After mobilizing, a mid back prehab program wouldn't be complete without some properly dosed strengthening and loading to build a strong back! I've included some of my go-to exercises for building up a strong back - you'll notice that strengthening the mid-back essentially means the entire pillar from the shoulders to the hips. Furthermore, your strengthening exercises should address all three planes of motion (sagittal, frontal, and transverse).
Exercise 04 of 06
Exercise demonstration
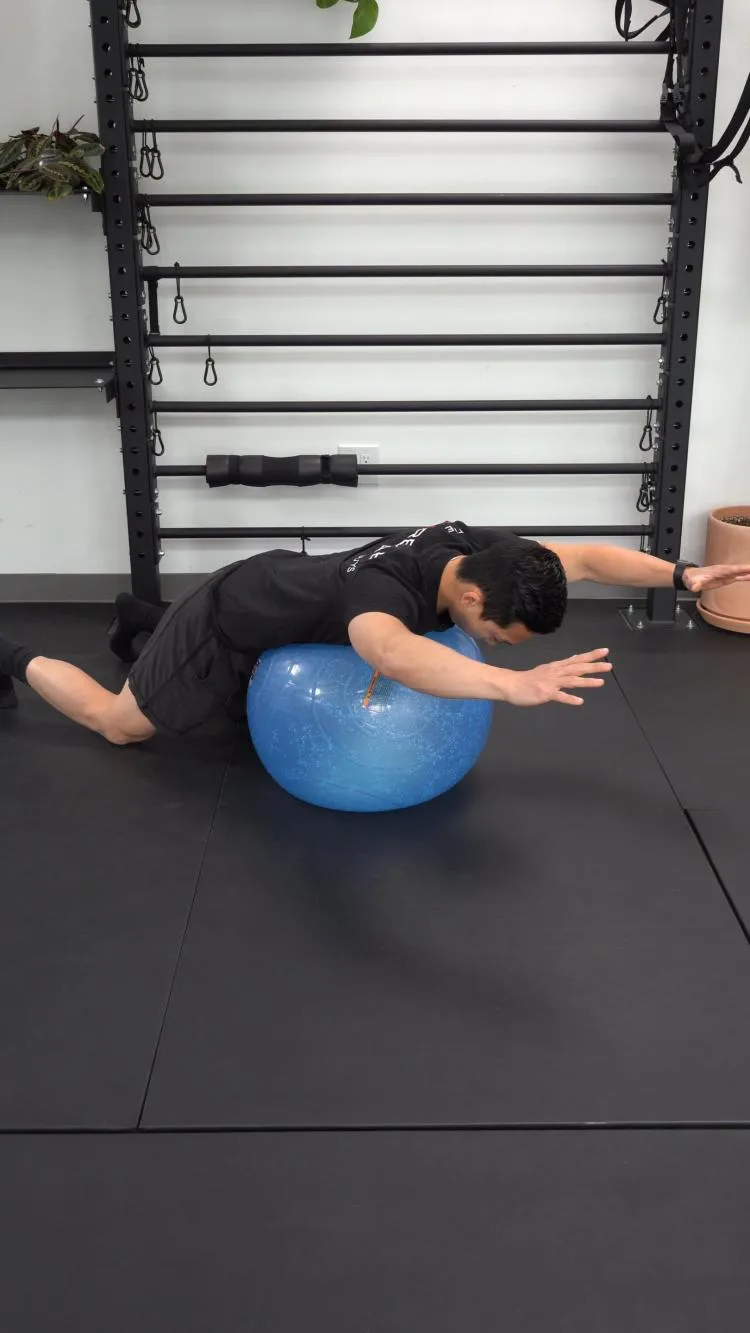
Prone Overhead Press - Swiss ball
View exercise instructions
- HOW: Start with your chest against the swissball with your knees on the ground. You can also place your toes on the ground as well if you would like. With your thumbs up and start with your elbows are your side, lift your elbows up towards the sky. Maintaining the reach towards the sky, slowly lift your elbows/hands in front of you like you are making a snowangel in the ground.
- FEEL: You should feel all the muscles in your shoulder blades working to lift your arms up.
- COMPENSATION: Lift with your shoulder blades, not necessarily with your shoulders or arms.
I'm a big fan of any prone swiss ball work as your entire back must actively be on to stabilize your pillar. It's a great entry-level exercise if you currently have mid back pain that hopefully shouldn't aggravate any of your symptoms. Adding the snow angel component also hits many of the scapular stabilizers like the traps and rhomboids.
Mid Back Strengthening Exercises Can Help Too!
Any front rack squat/lunge like a goblet squat, Zercher squat, or front squat will force your mid back muscles to turn on to maintain proper positioning. Again, it's a very easy way to learn to turn your mid back muscles by simply holding a weight in front of you while doing a leg exercise you are comfortable with. The key is to not let the weight pull you down. Your goal is to try to maintain an upright position!
Exercise 05 of 06
Exercise demonstration
Goblet Squat with KB
View exercise instructions
- HOW: Hold a kettlebell by the bell or the handles and keep it close to your chest as best as you can. Keep your shoulders lined up over your knees and ankles. Perform a squat while maintaining good form throughout your upper and lower body.
- FEEL: This should primarily be a leg workout as well as an upper-body workout as the KB gets heavier.
- COMPENSATION: Do not bend or arch your back excessively, do not lose form.
Exercise 06 of 06
Exercise demonstration
Barbell Deadlift

View exercise instructions
- HOW: Find your “power stance”, or the stance you would set up in if you were told to jump as high as you can. This is your starting position. Drive your feet into the ground and “spread the ground”. Pull the slack out of the bar and then lift the barbell using your legs.
- FEEL: You should feel all the muscles in your legs working, especially your posterior chain. Your back muscles will be working, but you shouldn’t feel like you are lifting with just your back.
- COMPENSATION: Keep a neutral back during the entire lift.
Working up to a weighted barbell deadlift would be the ultimate holy grail when it comes to mid back prehab. But if you're not comfortable with a barbell deadlift, there are still tons of other deadlift variations you can perform without a barbell that will strengthen your mid back similarly!

What About My Posture And My Mid Back Issues?
Mid back pain can definitely be posture related. Long days of sitting. Computer work. Driving. Studying. Reading. Gaming. Want to know what's similar between all the previous examples?
A lack of movement
Improving your posture can be as simple as taking movement breaks throughout the day! It doesn't have to be a long 15-minute walk around the office (although that would be great!), and can easily be taking a standing break for 10 seconds. Or simply shifting from an upright sitting posture to a reclined sitting posture. Movement is medicine! Check out some of these stretches you can do at your desk below!
2 Seated Mobility Drills for your Thoracic Spine
And remember, your posture does not have to be perfect! Check out this video by Dr. Greg Lehman on why perfect posture does not exist!
Closing Thoughts
There are a variety of exercises that can be implemented to improve the overall quality of mid back health. This includes a combination of mobility exercises, motor control, stability exercises, functional movements, and strengthening! Most importantly above all is to keep yourself moving and move often!
Take Control of Your Thoracic Spine Mobility!
When we think of the thoracic spine one word comes to mind; neglect. Thank you for striving to replace that word by completing this program! The thoracic spine is structurally designed to allow mobility to happen. If this area becomes neglected, the lower back and shoulders can become angry neighbors. The solution becomes restoring peace in the neighborhood by owning thoracic mobility. The block party is 8 weeks away and you hosting the thoracic spine, get ready to impress your neighbors!
About The Author
Michael Lau, PT, DPT, CSCS
Prehab Co-Founder & Chief Product Officer
 Michael was born and raised in Northern California but now currently resides in Sunny SoCal ever since attending the University of California, Los Angeles as an undergraduate majoring in physiology. After his undergraduate studies, he received his Doctorate in Physical Therapy from cross-town rival the University of Southern California. As a licensed physical therapist with a strong background in strength and conditioning, Michael likes to blend the realms of strength training and rehabilitation to provide prehab, or preventative rehabilitation, to his patients. A common human behavior is to address problems after they become an issue and far often too late, which is a reactionary approach. He believes the key to improved health care is education and awareness. This proactive approach-prehab-can reduce the risk of injuries and pain in the first place. He is a huge proponent of movement education and pain science. Clinically, he has a special interest in ACLR rehab and return to sport for the lower extremity athlete.