

On this page 10 sections
Your guide
What you'll learn
Jumper's knee is when there is irritation of the patella tendon, the tendon just beneath your knee cap. Patella tendon pain is a common source of anterior (front) knee pain often occurring from repetitive or excessive overload onto the patellar tendon. This is often a condition experienced by very active athletes, especially males, who participate in jumping sports such as volleyball, tennis, football, and basketball. Patellar Tendinopathy can be debilitating and result in prolonged absence and potential retirement from sports. Loading the tendon is the primary stimulus that helps with tendon health, but unfortunately, it's not that simple! This article will teach you all about jumper's knee and more importantly will show you jumper's knee exercises to help you get back to being active!
Do You Actually Have Jumper's Knee?
Before we get into the treatment of jumper's knee and the patellar tendon, we must first know it is truly your pain generator. Patellar tendon pain is typically experienced during periods of load which will immediately cease upon removal of the load. Oftentimes, people think they have patellar tendon pain when in reality they have patellofemoral pain, which is pain manifesting from where the knee cap or patella meets the femur or thigh bone. Hallmark signs of patellar tendinopathy include:
Patellar Tendon Anatomy

- Pain localized to the inferior pole of the patella, AKA pain just underneath the kneecap.
- Load-related pain increases with the demand on the knee extensors, notably in activities that store and release energy in the patellar tendon.
The Solution To Your Knee Problems

Knee cap and anterior knee pain can be one of the most frustrating and self-limiting injuries to deal with. The common issue we see is most of these injuries are never addressed or rehabbed correctly in the first place and the same underlying issues remain, which can be a recipe for another vicious cycle of pain and setbacks in the future. We’ve designed a comprehensive solution for you to get back to normal life and simple things like squatting and going downstairs pain-free! For more information, click HERE.
How Do You Fix Patella Tendon Pain?
The most investigated and effective intervention is exercise!
First, load modification is used with the goal of reducing pain. What do we mean by load modification? If playing soccer is your trigger to pain, at a minimum you should reduce the volume or intensity at which you are stressing that tendon. Likely you will just need to take some time off for a short period of time. However, a break from your sport doesn't mean complete rest (that will only make it worse), you will need to begin a progressive loading program when the time is right. Some pain is acceptable during or after exercise, however, symptoms should resolve quickly and should NOT worsen over the course of the loading program. Actually, loading often makes tendon pain feel better! This is known as the "warm-up effect."
A Staged Progression Is Necessary
 From JOSPT

3 Stages of Jumper's Knee Rehab
In the next portion of this article, we are going to progress you through the first 3 stages and provide you with some jumper's knee exercise examples through each stage.
Exercises for Jumper's Knee
Isometric exercises
With isometrics shoot for 5 repetitions of 45-second holds with a 2-minute rest break, you want to go heavy! The load should be at about 70% of the maximum amount of strength that you can hold. After 45 seconds you should be getting fatigued. Isometrics have been shown to reduce pain, which is why I love beginning my patients here. In this phase, you can also perform other exercises targeting your gluteals and calves in the meantime. Don't progress quickly through this phase, this often takes a few weeks to progress through.
Exercise 01 of 07
Exercise demonstration
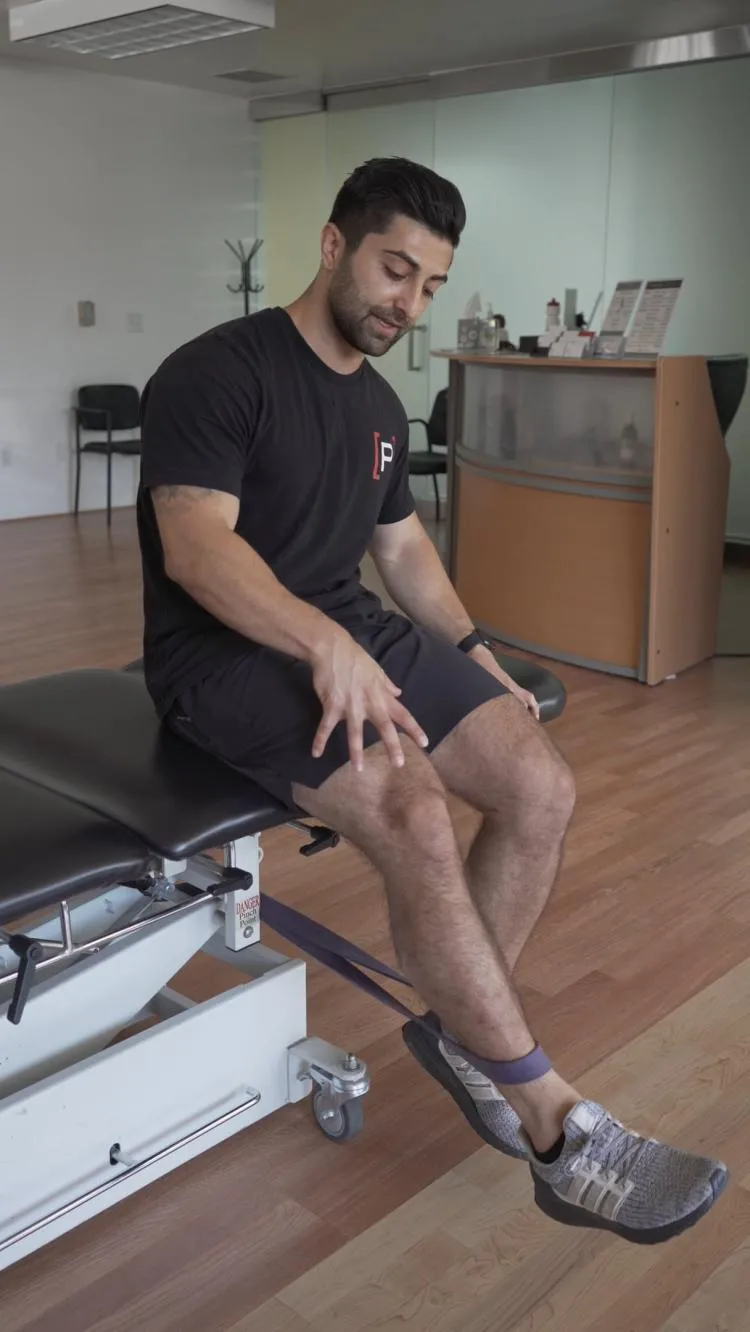
Seated Long Arc Quad Isometrics - Band
View exercise instructions
- HOW: Begin in a seated position with a band wrapped around your shin bone. Straighten out your knee by pulling into the band. Hold the desired position.
- FEEL: You will feel the thigh muscles working with this exercise.
- COMPENSATION: Please avoid moving at the entire trunk while performing this exercise, isolate the motion to the knee joint.
Exercise 02 of 07
Exercise demonstration
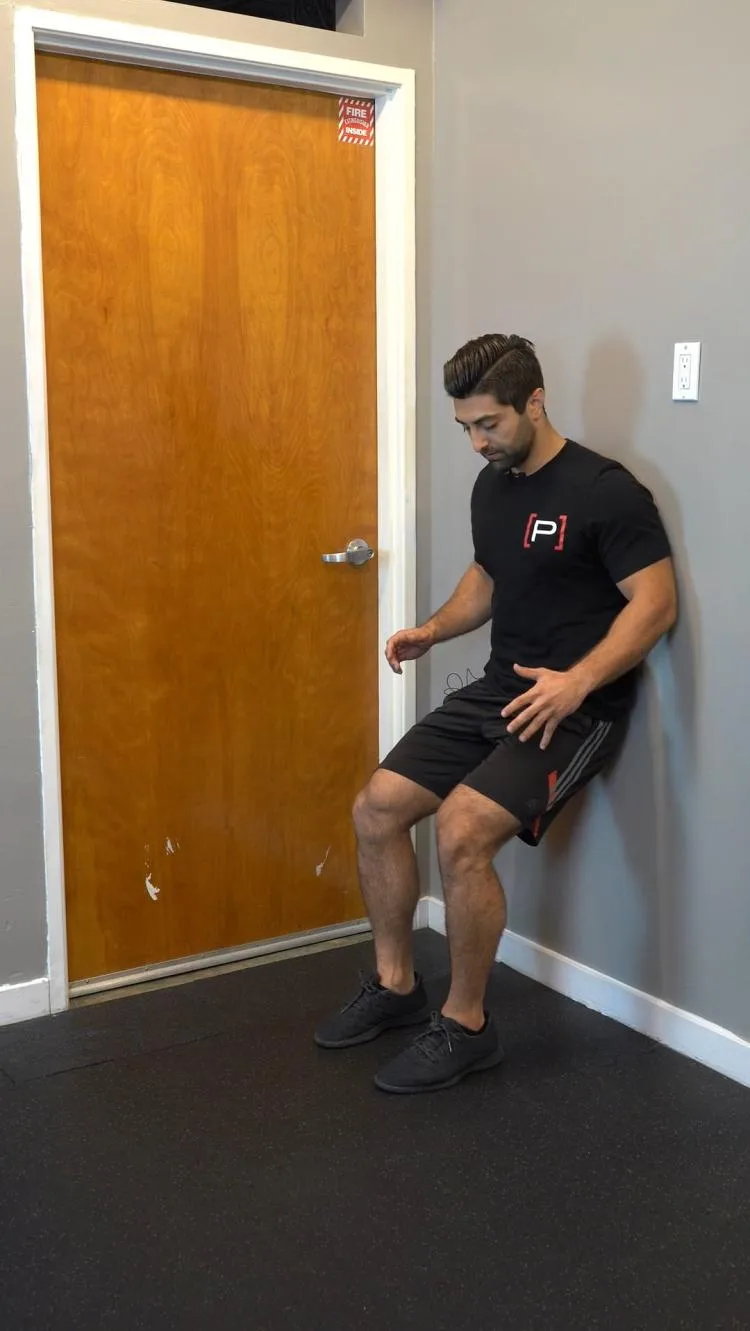
Wall Sit - 45 deg
View exercise instructions
- HOW: Begin in a standing position with your feet about hip width apart. Next focus on lowering yourself half way down and hold this position. Make sure to keep your back on the wall for the entirety of this exercise. The further you bring your feet away from the wall, the more challenging this exercise will be.
- FEEL: You will the muscles in the front of your thigh working with this exercise.
- COMPENSATION: Avoiding rounding at the back as you lower yourself on the wall. Maintain a straight back as you lower yourself.
Wall squats are an awesome place to start with weight-bearing isometrics! Find an angle you can tolerate and follow the parameters suggested above! This is one of our favorite exercises that's included in our Patellofemoral Pain Program that is an effective general approach to improving knee issues such as jumper's knee.
Isotonic Exercises
Isotonic exercises, just mean that you are keeping a load on a muscle while it's moving through a range of motion. Loaded isotonic exercises can begin when performing these exercises create pain of 3/10 or less. The more knee bending the more stress on the patella tendon, so work within your range of motion. When beginning this stage you will likely limit the knee bending to between 10 - 60 degrees of knee bending, proceed with caution here!
In this stage exercises should be performed for 15 repetitions max, meaning that you are at failure come 15 repetitions, for 3 to 4 sets. Every second day you can progress the load until you are at a 6 repetition max. This progression is based on a clinical trial by Kongsgaard et al.
Exercise 03 of 07
Exercise demonstration
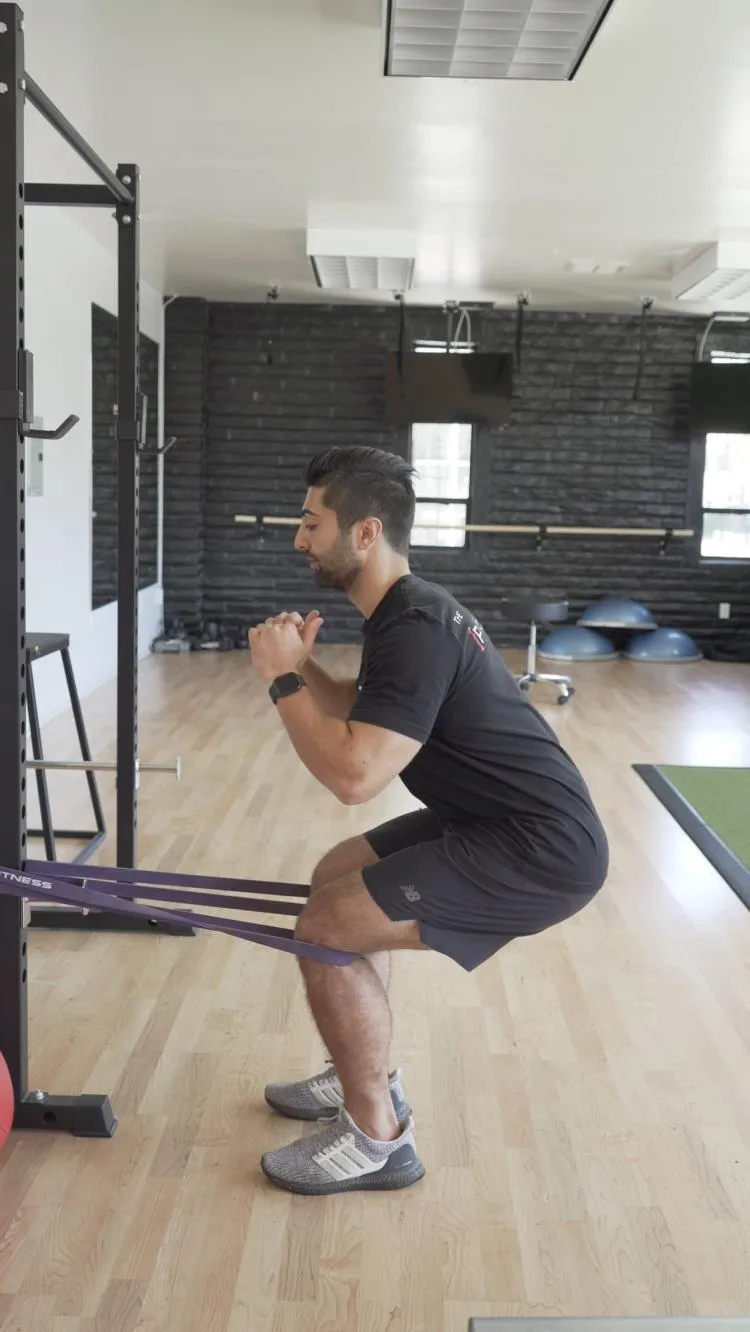
Spanish Squat
View exercise instructions
- HOW: Anchor a band roughly knee height, and place the band around the back of your lower leg. You will then perform a squat while leaning into the band and keeping your trunk straight.
- FEEL: You will feel the muscles on the front of your thigh working with this exercise.
- COMPENSATION: Avoid leaning your trunk forward. The more you lean into the band the easier it will be to keep your trunk upright.
Exercise 04 of 07
Exercise demonstration
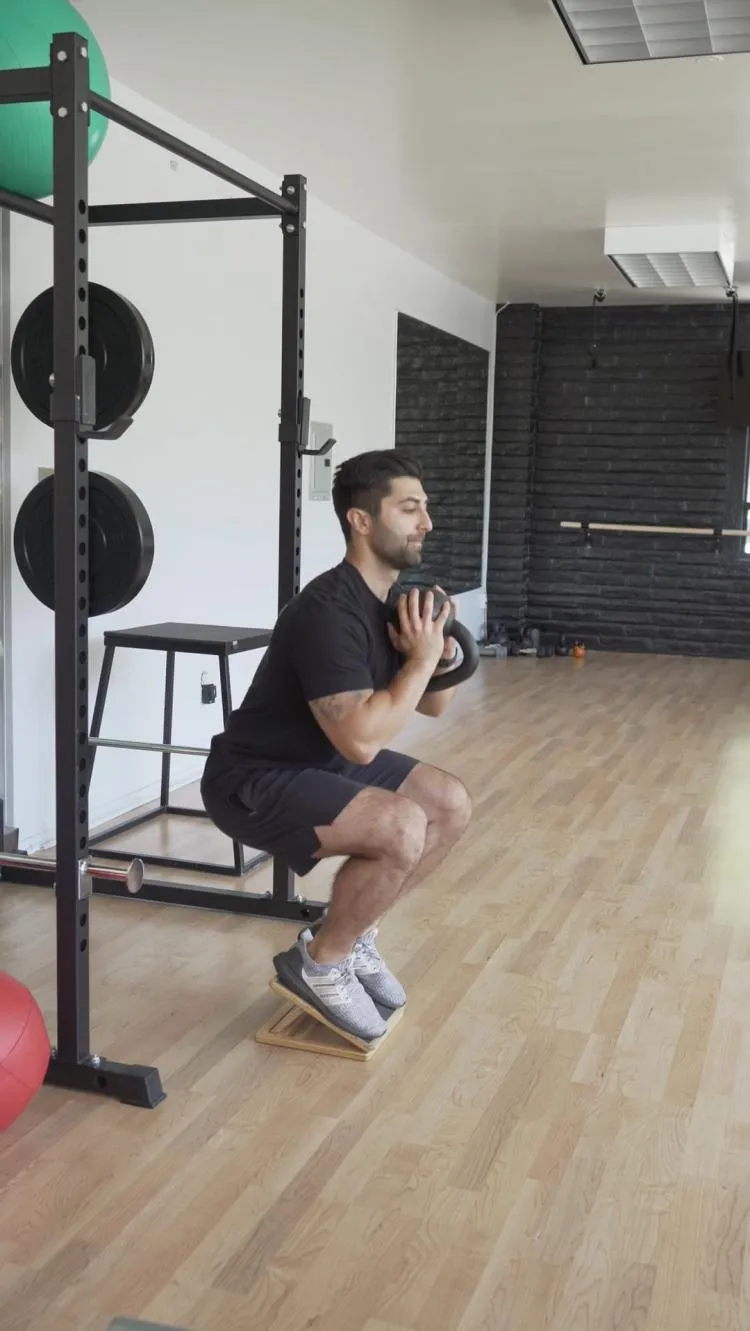
Goblet Squat - Wedge, Kettlebell
View exercise instructions
- HOW: Place a wedge underneath your heels while holding onto a load up against your chest. Perform a squat while trying to keep your trunk upright.
- FEEL: You will feel the muscles in your legs working, particularly the muscles on the front of your thigh.
- COMPENSATION: Don’t arch your back forwards as you squat down, keep an upright position.

Single-Leg Strengthening
Oftentimes, when pain is present individuals will compensate by biasing their opposite side. Single leg exercises are great to isolate each side independently. I also like the balance challenge single-leg exercises provide. Good strength is defined by performing 4 sets of 8 repetitions of a single-leg press with around 150% body weight for jumping athletes. This means that if you are 150 pounds, you should be able to single-leg press 225 pounds for 8 repetitions for 4 sets! That is a lot of weight!
Exercise 05 of 07
Exercise demonstration
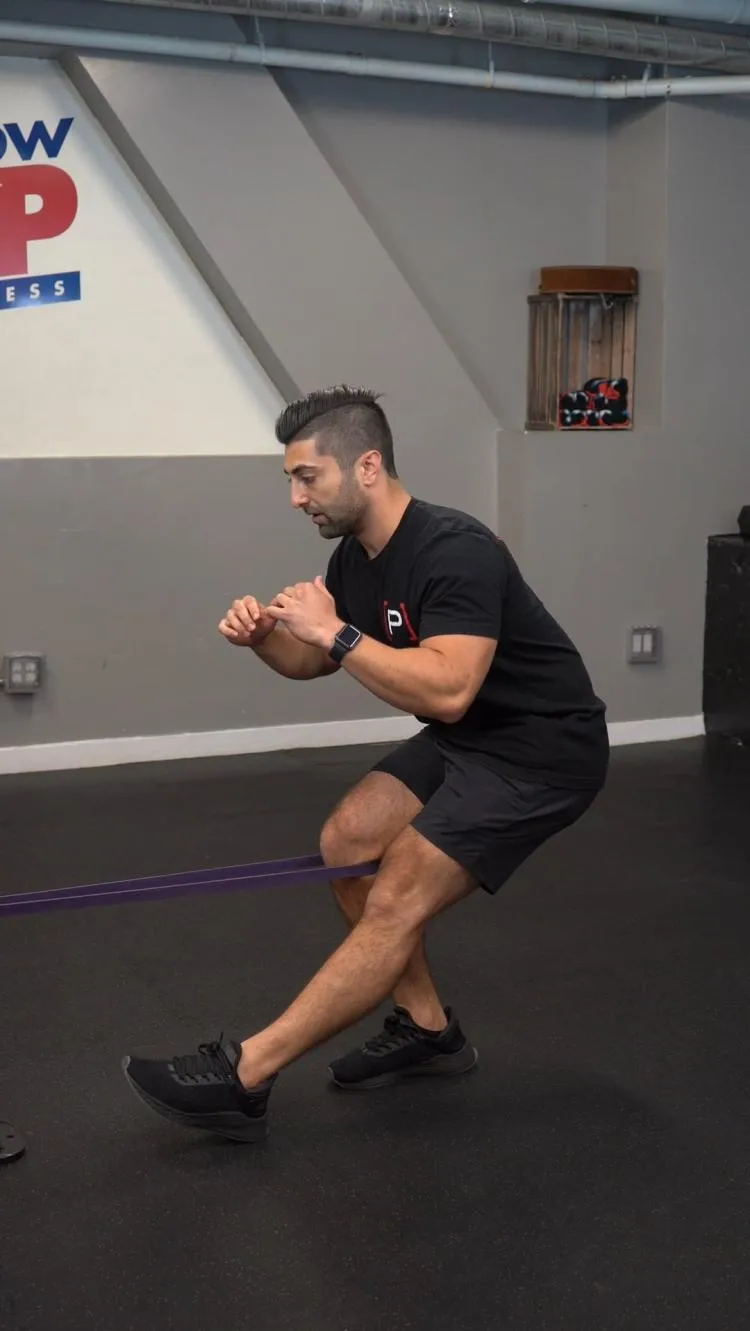
Single Leg Spanish Squat
View exercise instructions
- HOW: Anchor a band roughly knee height, and place the band around the back of the desired lower leg. Elevate one leg and stay balanced on the leg with the band. You will then perform a single leg squat while leaning into the band and keeping your trunk straight.
- FEEL: You will feel the muscles on the front of your thigh working with this exercise.
- COMPENSATION: Avoid leaning your trunk forward. The more you lean into the band the easier it will be to keep your trunk upright.
Exercise 06 of 07
Exercise demonstration
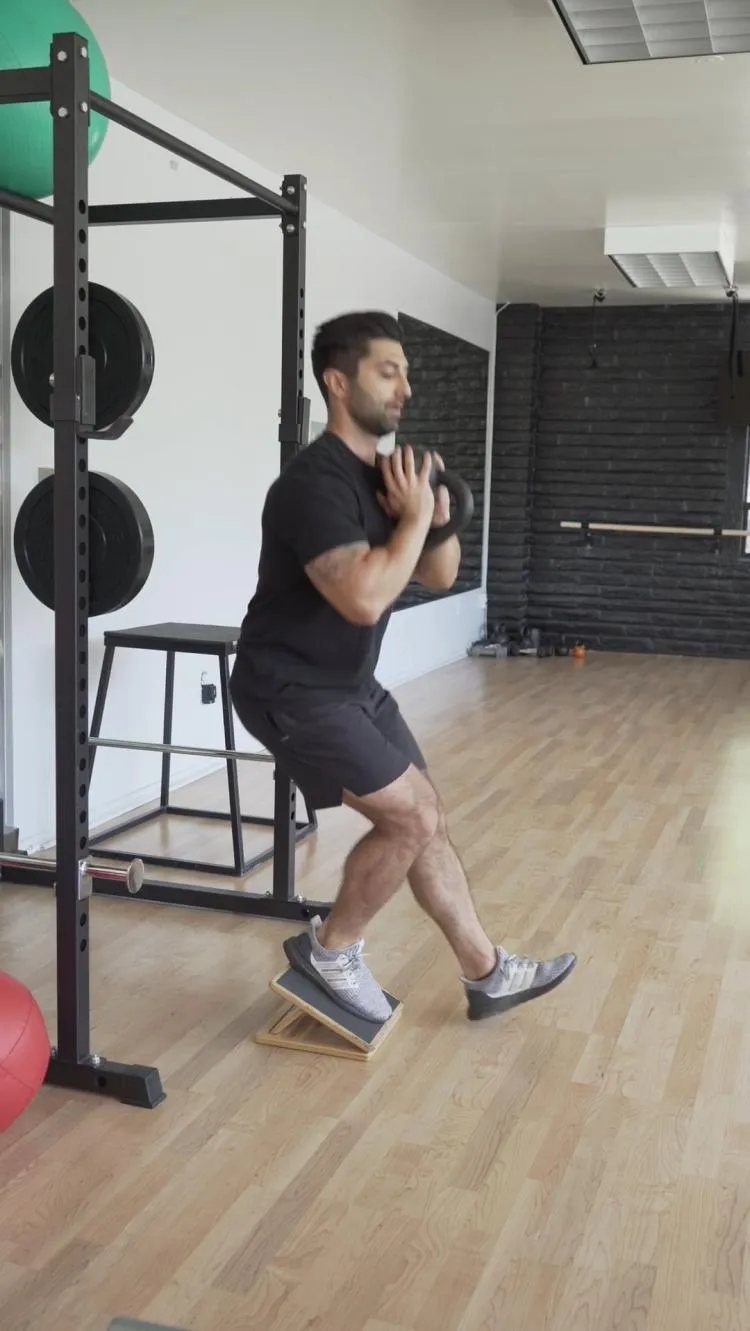
Anterior Step Down - Wedge, Kettlebell
View exercise instructions
- HOW: Place a wedge underneath your heel while holding onto a load up against your chest. Reach forward with the elevated leg as far as you can, tap the floor and return back to starting position.
- FEEL: You will feel the muscles in your legs working, particularly the muscles on the front of your thigh.
- COMPENSATION: Make sure the leg on the wedge is straight. The hip, knee, and ankle should be aligned.
Energy Storage
This is the last phase of jumper's knee exercises prior to returning to their desired sport! The power needed for jumping, landing, cutting, and pivoting requires the patellar tendon to repetitively store and release energy. Think of the tendons as springs, to help store and release energy. Introducing energy storage loads are critical to increasing load tolerance of the tendon.
Energy-storage exercises are a bit more provocative, based on a 72-hour collagen response to high tendon loading. This is why in this phase the exercises are recommended to be performed every third day.
Exercise 07 of 07
Exercise demonstration
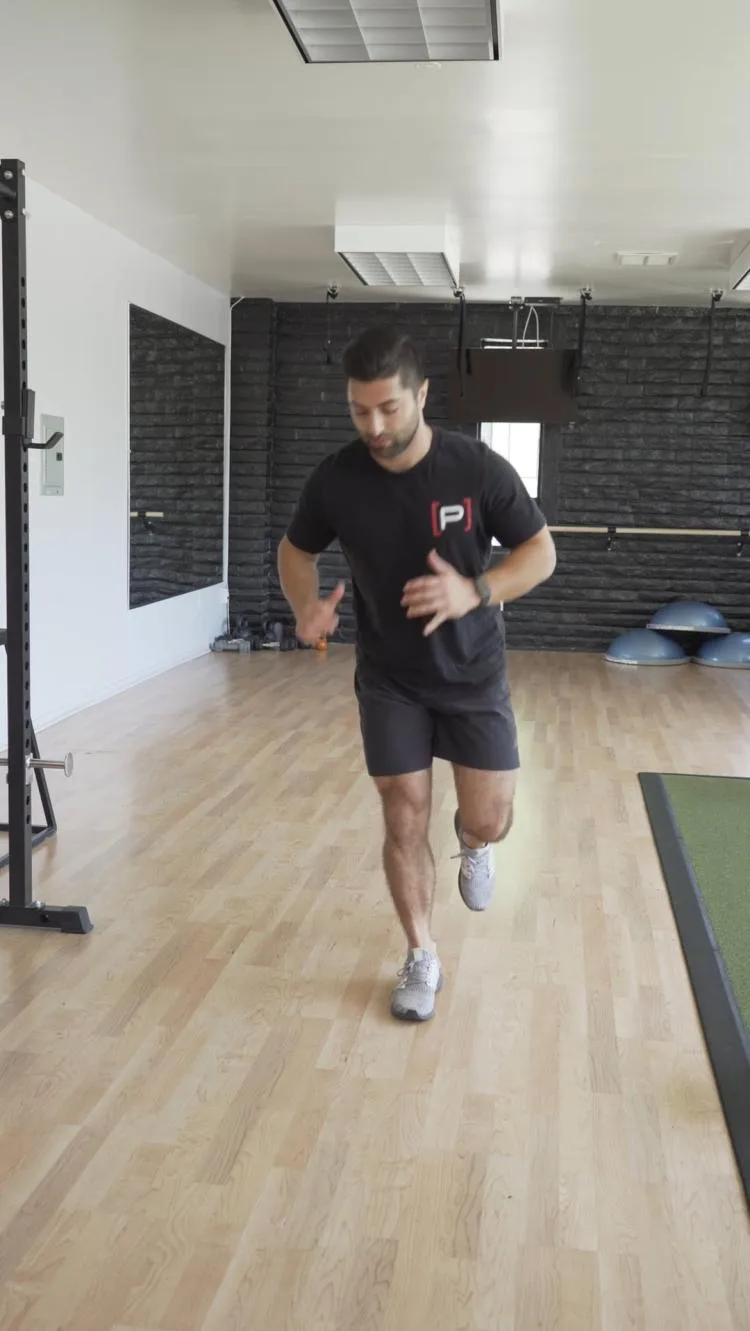
Single Leg Hop
View exercise instructions
- HOW: Start with one leg on the ground. Load the weight bearing leg to jump as high as you can. Control the landing, and pause prior to performing the next repetition.
- FEEL: You will feel all the muscles in your leg working to control the landing and descent.
- COMPENSATION: When you land, make sure your knee is aligned over your toes. Your knee should not dive inwards on the landing. Your goal is to absorb as much of the landing forces as you can and land softly. That means that you want your hip and knee to bend as much as they can to absorb the force. If you do not let them bend much, you will land “stiff” and hard. Let your hips go back and your chest go down to help absorb the forces. Your toes should touch the ground first when you land and quickly your heels will follow. You should land in a “ready position” like you would if you were playing sports, with your weight ever so slightly forward on the balls of your feet. You should not fall forward or backward after landing.
During your rehab from knee pain, that body seeks the path of least resistance. What is this path? Landing with a stiff knee to avoid stressing the quadriceps and patella tendon. This is a very common compensatory pattern seen after patellar tendinopathy. The key is to absorb the shock actively, this is achieved by landing softly!
Closing Thoughts
Return to sport is recommended when full training is tolerated without symptom provocation. You must also make sure there are no remaining power deficits. Power can be measured by testing a triple hop test for distance or a maximal vertical hop height. Prehab is HUGE when it comes to most injuries, and the jumper's knee is no different. You must prepare your body for all the jumping, cutting, and pivoting that your sport requires. Strengthening exercises are recommended at least twice per week, preferably loaded and single-legged for the remainder of your athletic career! Rehab for a jumper's knee can be slow and frustrating, make sure to progress through each of these phases. Rehab here has been known to take 6 months or longer, be patient! If you enjoyed this article on jumper's knee exercises please comment below!
Take Control of Your Knee Cap Issues
Patellofemoral (anterior or front of the knee) discomfort is naggy and sometimes down-right debilitating. It can prevent you from going up and down stairs, squatting, sitting for long periods of time, and kneeling. As you progress through the Patellofemoral [P]rehab Program you will learn to manage the pain in the front of your knee, improve flexibility, learn to regain control of your knee, and most importantly trust your knee again!
References
- Kountouris A, Cook J. Rehabilitation of Achilles and patellar tendinopathies. Best Pract Res Clin Rheumatol. 2007; 21: 295– 316.
- Rio E, Moseley L, Purdam C, et al. The pain of tendinopathy: physiological or pathophysiological? Sports Med. 2014; 44: 9– 23.
- Kongsgaard M, Kovanen V, Aagaard P, et al. Corticosteroid injections, eccentric decline squat training and heavy slow resistance training in patellar tendinopathy. Scand J Med Sci Sports. 2009; 19: 790– 802
- Malliaras P, Cook J, Purdam C, et al. Patellar Tendinopathy: Clinical Diagnosis, Load Management, and Advice for Challenging Case Presentations. Journal of Orthopaedic & Sports. Physical Therapy, 2015 Volume:45 Issue:11 Pages:887–898
- Langberg H, Skovgaard D, Petersen LJ, Bülow J, Kjaer M. Type I collagen synthesis and degradation in peritendinous tissue after exercise determined by microdialysis in humans. J Physiol. 1999; 521 pt 1: 299– 306.
About The Author
Arash Maghsoodi, PT, DPT, CSCS
[P]rehab Co-Founder & Chief Marketing Officer
 Arash Maghsoodi received his Doctorate in Physical Therapy from the University of Southern California. For his undergraduate studies, he attended San Diego State University and studied Kinesiology. After sustaining a career-ending ankle sprain while playing collegiate soccer, he realized how disabling and life-altering injuries can be. Arash currently resides in beautiful Santa Monica, California. His clinical experience is primarily in the orthopedic and sports setting. He has treated a wide variety of conditions ranging from the post-operative individual to the professional athlete. Arash is keeping the family legacy of becoming a physical therapist, as his mother is a practicing clinician of 30 years in the Orange County area.